Experience Center
Configuring Privileged Portals
After you have added an application segment with Privileged Remote Access, you can go to the Privileged Portals page. You can have up to 100 privileged portals. For a complete list of ranges and limits, see Ranges & Limitations.
To add a privileged portal:
- Go to Policies > Access Control > Clientless >Privileged Portals.
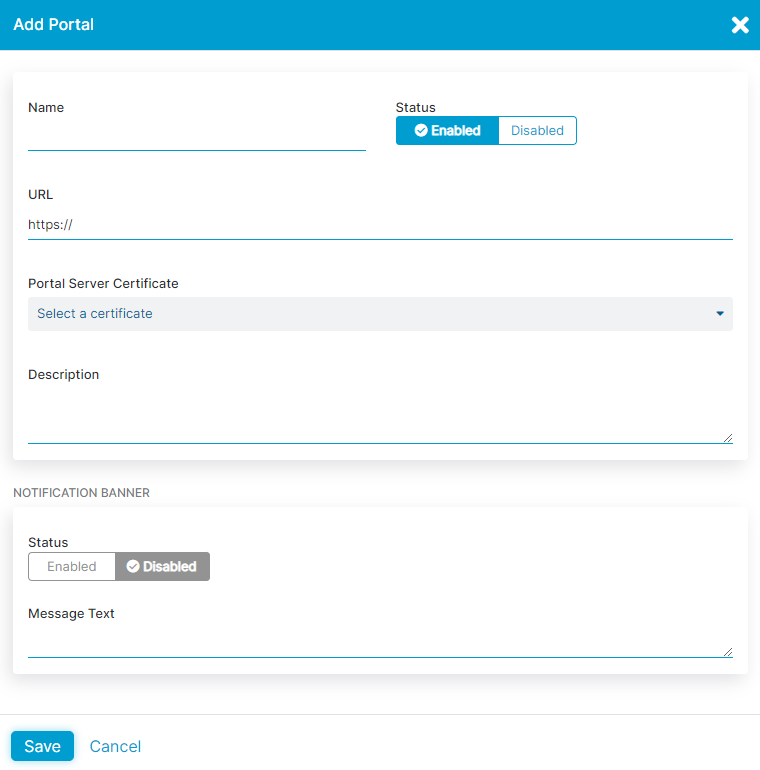
- Click Add Portal. The Add Portal window appears.
- In the Add Portal window:
- Name: Enter a name for the privileged portal. The name cannot contain special characters, with the exception of periods (.), hyphens (-), and underscores ( _ ).
- Status: Enable the privileged portal. If Disabled, the privileged portal is inaccessible to end users.
- URL: Enter the full URL for the privileged portal. This is the URL that users access to view the portal. The URL must use the HTTPS protocol and be a fully qualified domain name (FQDN).
A privileged portal's FQDN cannot be configured as an application within an application segment.
- Portal Server Certificate: Select the Browser Access (i.e., web server) certificate from the drop-down menu that can be associated with the privileged portal. You can click Clear Selection to unselect the certificate. To learn more, see About (Web Server) Certificates.
The certificate must support the FQDN specified for the privileged portal.
- Description: (Optional) Enter a description for the privileged portal.
- If you want to display a notification to your users at the top of the Privileged Remote Access portal page, under Notification Banner:
- Status: Enable the notification banner.
- Message Text: Enter the notification text that you want displayed in the Privileged Remote Access portal's banner.

- Click Save.
- On the Privileged Portals page, expand the row to view the privileged portal details within the table, then click the Copy icon next to the Canonical Name (CNAME). You need this CNAME record for your public DNS.

- Add the CNAME information you just copied to your public DNS and verify that the FQDN for the privileged portal resolves to the record.
For example, for a CNAME of:
https://la-portal.com. CNAME 72057594038060561.72057594037927936.pra.p.zpa-app.net
You would need to verify that https://la-portal.com resolves to 72057594038060561.72057594037927936.pra.p.zpa-app.net.
The DNS CNAMEs for privileged portals in accounts might have changed in the Admin Portal. Check that the CNAME you configured in the privileged portal matches the updated DNS CNAME.