Experience Center
Configuring Custom Controls
Within the Admin Portal, you can add custom controls to use as part of your AppProtection profiles. To learn more, see About AppProtection Profiles. For a complete list of ranges and limits for custom controls, see Ranges & Limitations.
To add a new custom control:
- Go to Policies > Cybersecurity > Inline Security > Protection Controls.
- Click Custom Controls.
- Click Add Custom Controls.
The Add Custom Control window appears. - In the Add Custom Control window, complete the following:
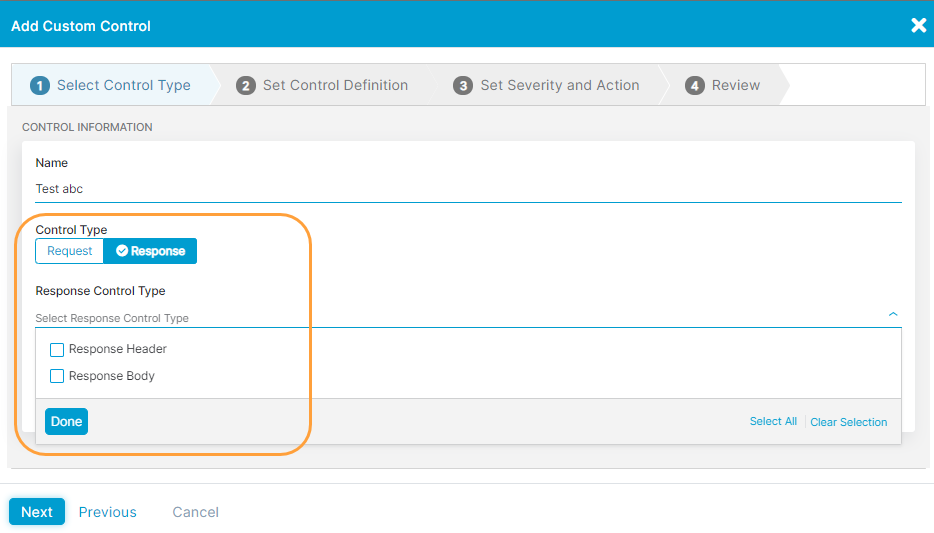
- Step 1: Select Control Type
- Enter a name for the custom control. The name cannot contain special characters, with the exception of periods (.), hyphens (-), and underscores ( _ ).
- Select a Control Type:
- Request
- Response
- Choose one or more control parameters for the selected Control Type, and click Done. Click Select All to choose all parameters, or click Clear Selection to remove all selections.
- Request
- Request Header
- Request Uri
- Query String
- Request Cookie
- Request Body
- Request Method
- Response
- Response Header
- Response Body
- Request
- (Optional) Enter a description.
- Click Next.
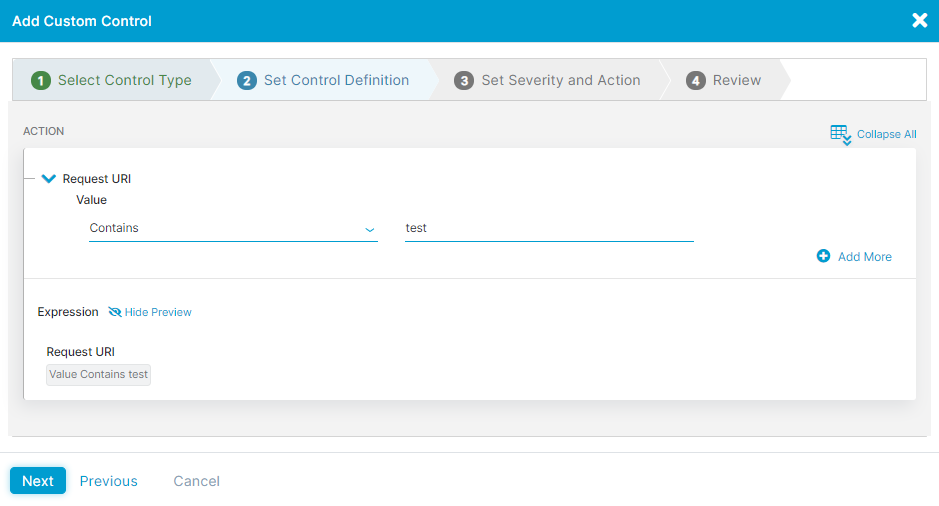
- Step 2: Set Control Definition
On the Set Control Definition tab, you see the control parameters selected in the Select Control Type tab. There are different required settings to enter depending on what you selected. This lets you define how user traffic is inspected.
To set the control:
- For each control parameter, expand to view the required settings.
- Enter the relevant identifying item, if required for the control parameter. For example, if the control parameter is a Request Header, enter the header name.
There is a limit of 2,500 characters for the text field.
- For Size, select an operator and enter a value for the control parameter’s size. Click Add More if you need additional sizes for this control parameter. There is a 1 MB inspection limit for Request and Response Headers, so only the first 1 MB will be inspected.
If =, >, or < are used once when setting up a custom control, you can’t use it again in the same custom control.
- For Value, select an operator and enter a value for the control parameter’s value. Click Add More if you need additional values for this control parameter. To learn more about the available Regex values, see Defining Regular Expression Values.
- For Request Method, select from one of the available options:
- GET
- PUT
- POST
- DELETE
- Repeat steps a-d for each control parameter.
- Click Show Preview to review how the controls are expressed.
- Click Next.
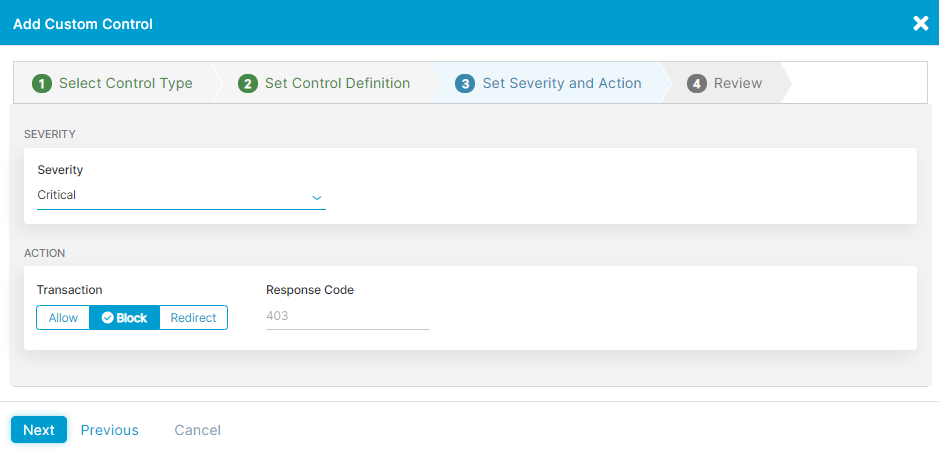
- Step 3: Set Severity and Action
- For Severity, select the severity level for this custom control:
- Critical: The greatest level of concern.
- High: The second greatest level of concern.
- Medium: The third greatest level of concern.
- Low: The least level of concern.
In addition to severity levels, custom controls have a paranoia level of 1 as they are used in an AppProtection profile.
- For Action, select how the user traffic will be handled for the control parameters selected in the Select Control Type tab and defined on the Set Control Definition tab:
- Allow: The user is allowed to proceed with the current URL.
- Block: The user receives a 403 response code.
- Redirect: The user receives a different URL. Enter an alternative URL that the user is redirected to.
- Click Next.
- For Severity, select the severity level for this custom control:
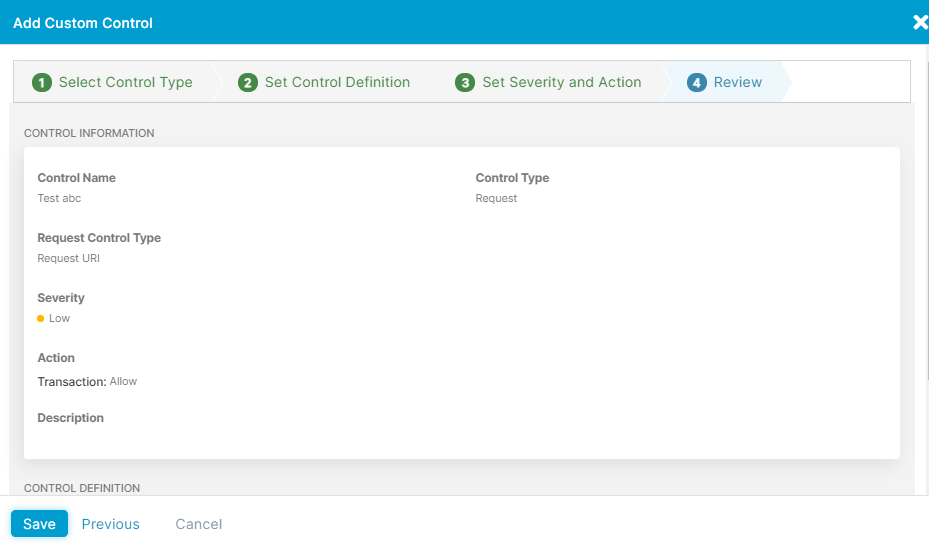
- Step 4: Review
On the Review tab, review the custom control configurations. The details are divided into the general information about the custom control and how the control is defined.
Close
- Step 1: Select Control Type
- Click Save.


