Experience Center
Configuring Privileged Approvals
After you have created a privileged portal and a privileged console, you can go to the Privileged Approvals page to create a privileged approval. For a complete list of ranges and limits, see Ranges & Limitations.
Prior to creating a privileged approval, it is recommended that you go to the Access Policy page and create an access policy with the rule action Conditional Access selected and the Allow for Privileged Approval checkbox selected. If you create a privileged approval before setting an access policy, the privileged approval and its related application segments cannot take effect until the access policy is created with the related application segments.
To add a privileged approval:
- Go to Policies > Clientless > Privileged Approvals.
- Click Add Approval.
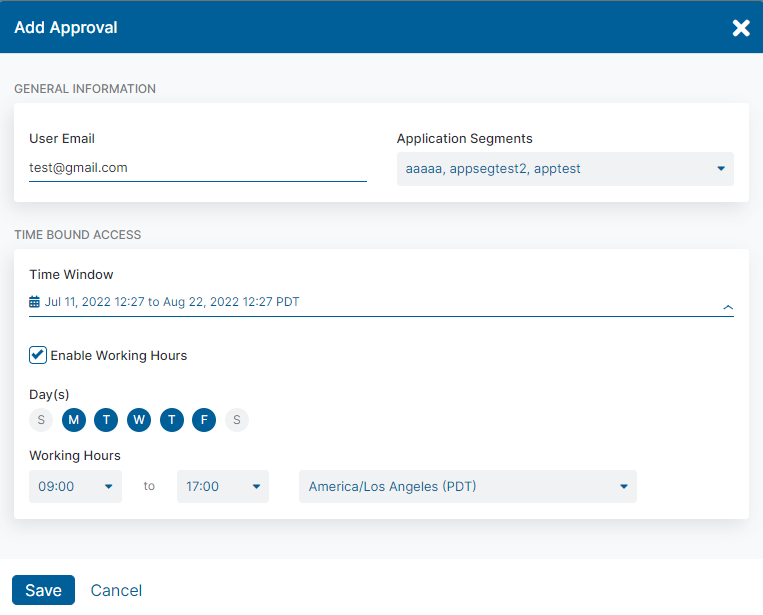
The Add Approval window appears.
- In the Add Approval window, configure the following privileged console information as needed:
- General Information
The user email should match the tenant's identity provider (IdP), specifically the NameID attribute in the SAML Assertion.
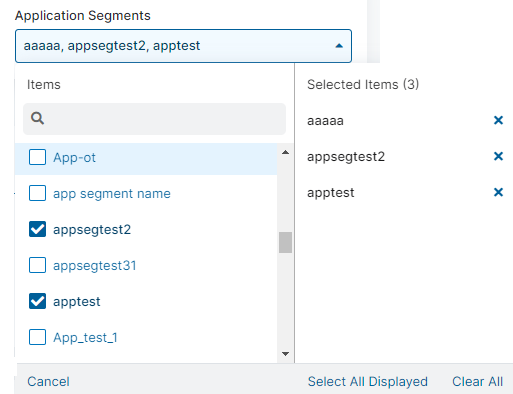
- Application Segments: Select the application segments you want to include in the privileged approval. You can search for a specific application segment, click Select All to apply the application segments visibly listed, or click Clear Selection to remove all selections. There is no limit to the number you can select. Click Done after you have made your selections. Click the Delete icon in a selected application segment to remove it from your list.
- Time Bound Access
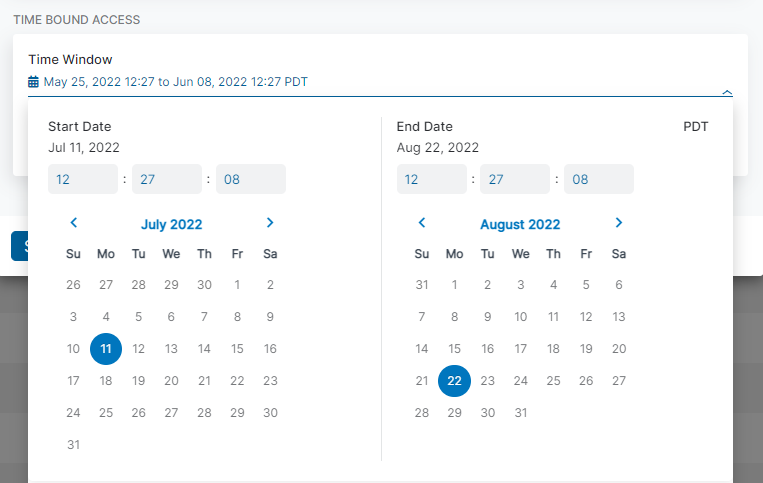
- Time Window:
- Select the start date by clicking a day on the calendar under Start Date. You can use the arrows next to the month and year of the calendar to select a different month.
- Enter a start time above the calendar under Start Date.
- Select the end date by clicking a day on the calendar under End Date. You can use the arrows next to the month and year of the calendar to select a different month.
- Enter an end time above the calendar under End Date.
- (Optional) Select Enable Working Hours to specify what hours and days of the week the time window is going to be active. The default is 9:00 start time and 17:00 end time for a 24-hour window.
- Time Window:
- Click Save.
If you are a third-party user or contractor using a Microtenant with Privileged Approvals disabled, you cannot add a privileged approval.
User Validations
When Emergency Access isn't configured, the validation to check that users exist before a privileged approval is created does not occur. You need to manage those users within your IdP.
When Emergency Access is configured, only users that are from arbitrary authentication domains are validated. If the user does not exist in the IdP enabled for emergency access, the user is created when creating the privileged approval. You can manage the user on the Emergency Access Users page.
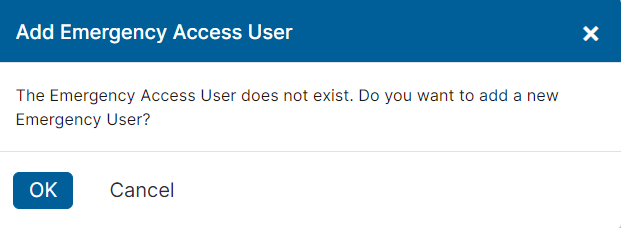
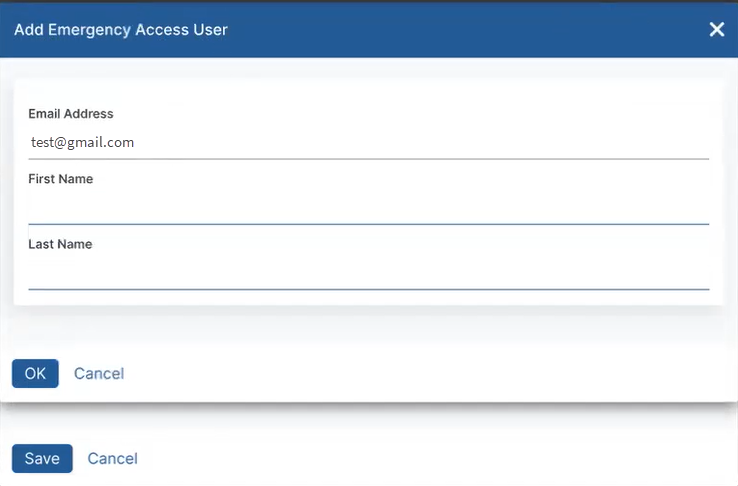
If Emergency Access is enabled, a window appears to designate the new user as an emergency access user.
The Add Emergency Access User window only appears if:
- The email address entered doesn't match the authentication domain of the primary or secondary domain.
- Emergency access is already configured.
- The specified email domain is added to the Emergency Authentication Domains field.
- The user doesn't exist in the IdP enabled for emergency access.
To add an Emergency Access user:
- In the Add Emergency Access User window, click OK and fill out the following fields:
- Email Address: The email address of the privileged approval user.
- First Name: The first name of the privileged approval user.
- Last Name: The last name of the privileged approval user.
- Click OK, and the user is added to the Emergency Access Users page.

