Experience Center
Accessing Privileged Requests
You can view and filter data for privileged approval requests as part of My Approvals. To view privileged approval request data, go to Logs > Insights > Privileged Remote Access > Requests.
Requests Tools
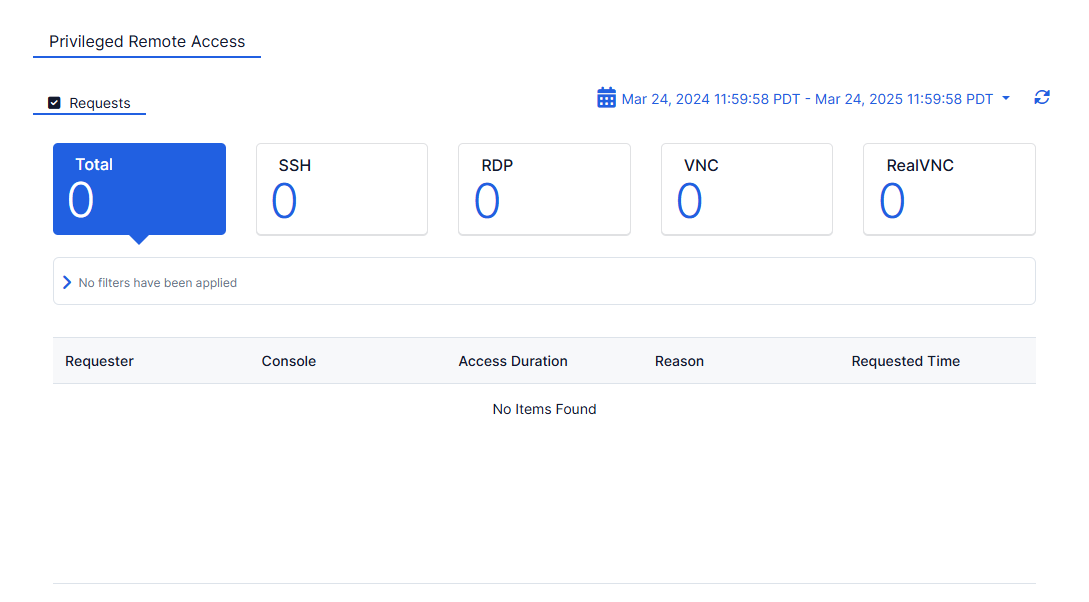
The Requests page displays the following information and functionality:
- Time Range Filter: View privileged approval request data over a period between 1 Hour to 365 Days. To change the time range, click the Calendar menu and select a preset range or select Custom Range. If you use Custom Range, the start date must be within the last 365 days. The end date automatically sets to the system's current time. To change the time zone, click the current Time Zone button. This filter applies to all widgets on the Requests page. By default, the detailed activity for all privileged approval requests is displayed for My Approvals that occurred in the last 24 hours.
- Refresh Icon: Refresh the dashboard to reflect the most current information.

Viewing Requests
By default, the table displays the Total Requests created in a privileged portal. You can change this by choosing one of the following filters:
- SSH: The total number of privileged approval requests for privileged consoles that are SSH-enabled.
- RDP: The total number of privileged approval requests for privileged consoles that are RDP-enabled.
- VNC: The total number of privileged approval requests for privileged consoles that are VNC-enabled.
- RealVNC: The total number of privileged approval requests for privileged consoles that are RealVNC-enabled.
Filtering Requests
You can apply filters or drill down further into the privileged approval request data using the Query Builder. By default, no filters are applied.
To configure filters using the Query Builder:
- Console: See logs for a specific privileged console.
- Requester: See logs for a specific user who requested a privileged approval.
- Click Add Filters and select a filter from the drop-down menu. The character & cannot be used in the Add Filters field.
- Select an operator from the drop-down menu (e.g., Contains). The operators available are determined by the filter you are configuring.
- Select the fields from the drop-down menu or enter the values required for the filter. The field or value required is determined by the filter you are configuring.
Filters using the Contains operator allow a maximum of 7 entries. All filters using operators that require text input must use a semicolon (;) to separate multiple entries (e.g., 137; 138; 139). When configuring multiple text entries and using the Less Than operator, the results show transactions starting from the largest entry provided. When configuring multiple text entries and using the Greater Than operator, the results show transactions starting from the smallest entry provided.

- Click Apply.
To apply more filters, click Add Filters again. The filter query section within the page updates automatically to include the proper filter for the field name you selected, along with the applicable operator configuration for that field. The character & cannot be used in the Add Filters field.
To remove an added filter, click the Close icon then click Apply. To remove all filters, click Clear All.
The table displays the following data for privileged approval requests:
- Requester: The user who requested the privileged approval.
- Console: The privileged console that the privileged approval request was created for.
- Access Duration: The length of time that the access for the privileged approval is available for.
- Reason: If a reason was included during the creation of the privileged approval request, it is displayed here.
- Requested Time: The time stamp of when the privileged approval request was created.

