Experience Center
Customizing Zscaler Client Connector with Install Options for Linux
You can use the application package, the Debian package, or the RPM Package Manager (RPM) to manually install Zscaler Client Connector on a device. You can also use these packages if you're deploying the app to users through a device management method that supports Linux devices.
After downloading the Zscaler Client Connector package, you can deploy the file with your device management method or add install options to customize the app package using various /unified/configuring-forwarding-profiles-zscaler-client-connectorcommand-line options. You can edit the parameter configuration in both the Debian package and the RPM package using a Zscaler script.
Zscaler Client Connector relies on the Linux systemd-resolved service to manage DNS configurations. Because /etc/resolv.conf is a symbolic link to /run/systemd/resolve/stub-resolv.conf, you should not modify the /etc/resolv.conf file when deploying Zscaler Client Connector for Linux.
This article covers the following topics:
- Installing Prerequisite Dependencies
As long as your device is connected to the network, the application installer automatically installs the necessary prerequisite package dependencies for you. The individual package dependencies are listed here for reference:
- Debian-based operating system
Install the following dependencies depending on the distribution you're using:
- Ubuntu 22.04.5 LTS and earlier
- libglib2.0-0
- net-tools
- libqt5dbus5
- libqt5core5a
- libqt5gui5
- libqt5opengl5
- libqt5qml5
- libqt5quick5
- libqt5quickcontrols2-5
- libqt5quickparticles5
- libqt5quickwidgets5
- libqt5sql5
- libqt5sql5-sqlite
- libqt5webchannel5
- libqt5webengine5
- libqt5webenginecore5
- libqt5webenginewidgets5
- libqt5webkit5
- libqt5webview5
- libqt5widgets5
- dbus
- libdbus-glib-1-2
- libnss3-tools
- libnss-resolve
- libpcap0.8 curl
- jq
- systemd-coredump
- Ubuntu 24 LTS
- libglib2.0-0t64
- libqt5dbus5t64
- libqt5core5t64
- libqt5gui5t64
- libqt5opengl5t64
- libqt5qml5
- libqt5quick5
- libqt5quickcontrols2-5
- libqt5quickparticles5
- libqt5quickwidgets5
- libqt5sql5
- libqt5sql5-sqlite
- libqt5webchannel5
- libqt5webengine5
- libqt5webenginecore5
- libqt5webenginewidgets5
- libqt5webkit5
- libqt5webview5
- libqt5widgets5t64
- dbus
- libdbus-glib-1-2
- libnss3-tools
- libnss-resolve
- libpcap0.8t64
- curl
- jq
- systemd-coredump
- Debian
- libglib2.0-0
- net-tools
- dbus
- libqt5core5a
- libqt5webengine5
- libqt5webenginewidgets5
- libqt5sql5
- libqt5webkit5
- libdbus-glib-1-2
- libnss3-tools
- libnss-resolve
- libpcap0.8
- curl
- jq
- systemd-coredump
- Ubuntu 22.04.5 LTS and earlier
- RPM-based operating system
Install the following dependencies depending on the distribution you're using:
- Fedora and CentOS Stream 8 and later
- dbus-devel
- dbus-glib-devel
- qt5-qtwebengine
- qt5-qtbase-devel
- net-tools
- dbus
- dbus-glib
- nss-util
- ca-certificates
- libpcap
- systemd
- curl
- jq
CentOS 9 stream has an additional package, systemd-resolved, that is part of the Extra Packages for Enterprise Linux (EPEL) repository which must be installed separately for CentOS. The CentOS OS is required to enable the EPEL repository for Qt packages. Use one of the following commands to enable the EPEL repository:
sudo yum -y install epel-releasesudo yum -y --disablerepo="*" --enablerepo="epel" update
- Red Hat Enterprise Linux (RHEL)
- dbus-devel
- dbus-glib-devel
- qt5-qtbase
- qt5-qtwebengine
- net-tools
- dbus
- dbus-glib
- ca-certificates
- nss-util
- nss
- libpcap
- curl
- jq
RHEL 9 has an additional package, systemd-resolved, that is part of the Extra Packages for Enterprise Linux (EPEL) repository which must be installed separately for RHEL 9. The qt5-qtwebengine is also part of the EPEL repository. You must enable the EPEL repository using the following commands:
- For RHEL 8:
sudo yum -y installhttps://dl.fedoraproject.org/pub/epel/epel-release-latest-8.noarch.rpm - For RHEL 9:
sudo yum -y installhttps://dl.fedoraproject.org/pub/epel/epel-release-latest-9.noarch.rpm
- Arch Linux
- glib2
- net-tools
- inetutils
- qt5-base
- qt5-tools
- qt5-webengine
- dbus-glib
- ca-certificates
- nss
- libpcap
- wget
- curl
- jq
- openSUSE Leap
- dbus-1
- dbus-1-devel
- dbus-1-glib
- dbus-1-glib-devel
- ca-certificates
- nss-systemd
- systemd-network
- libpcap1
- libpcap-devel
- libQt5Core5
- libQt5WebKit5
- libQt5WebView5
- systemd
- curl
- jq
- systemd-coredump
- mozilla-nss-tools
- Fedora and CentOS Stream 8 and later
If dependencies don't automatically install, you can install them manually by entering all dependencies in a command line on one line without line breaks, as in the following examples:
Example for Debian:
sudo apt install libglib2.0-0 net-tools dbus libqt5core5a libqt5webengine5 libqt5webenginewidgets5 libqt5sql5 libqt5webkit5 libdbus-glib-1-2 libnss3-tools libnss-resolve libpcap0.8 curl jq systemd-coredump -yExample for RPM:
Closesudo yum install dbus-devel dbus-glib-devel qt5-qtwebengine qt5-qtbase-devel net-tools dbus dbus-glib nss-util ca-certificates libpcap system curl jq -y - Debian-based operating system
- Installing the Application using the Zscaler Run File
You must have administrator permission to do the installation.
To download and install the application:
- From a terminal window, open a command prompt as administrator.
- Download the Zscaler run file from the Zscaler Client Connector App Store on the Admin Portal. To learn more, see Understanding Zscaler Client Connector App Downloads.
- Navigate to the folder with the installation file:
cd ~/Downloads- Make the file executable using the following command:
sudo chmod a+x Zscaler-linux-<version number>-installer.run
- Install the application using the following command:
sudo ./Zscaler-linux-<version number>-installer.run- Leave the token form empty. You'll see the progress of your installation.
- Installing the Application using the Debian Package
You must have administrator permission to do the installation. Contact Zscaler Support to obtain the Debian package.
Installing Zscaler Client Connector with the Debian package requires the following two-step process to ensure you can provide install parameters during the installation:
- Install the Debian package.
- Configure installation parameters using either interactive or silent mode.
The Debian package is a silent installer and does not allow any arguments to pass next to it. For example, this command would not work with the Debian package:
sudo
.deb --strictEnforcement 0 --enableFips 1. The configuration script
zscaler-configresolves this issue. This script edits the parameters in this file:/opt/zscaler/.config.ini.
The Zscaler Debian package name follows this convention:
<packagename>_<version number>-<Debianrevisionnumber>_<Debianarchitecture>".deb
Zscaler's package name is:
zscaler-client_<version number>_amd64.debzscaler-client-debug_<version number>_amd64.deb
Examples:
zscaler-client_1.3.0.11-0_amd64.debzscaler-client-debug_1.3.0.11-0_amd64.deb- Installing the Debian Package
Zscaler recommends installing
systemd-coredumpbefore installing the Zscaler Client Connector Debian package.Use one of the following commands to install the Debian package on the system:
dpkg -i<absolutePathToThePackage>sudo apt-get install<absolutePathToThePackage>
Examples:
sudo dpkg -i /home/zuser/Downloads/zscaler-client_1.3.0.11-0_amd64.debsudo dpkg -i ~/Downloads/zscaler-client_1.3.0.11-0_amd64.debsudo apt-get install /home/zuser/Downloads/zscaler-client_1.3.0.11-0_amd64.debsudo apt-get install ~/Downloads/zscaler-client_1.3.0.11-0_amd64.deb
- Removing the Debian Package
Use one of the following commands to remove the Debian package from the system:
sudo apt-get remove<PackageName>sudo apt-get purge<PackageName>
Examples:
sudo apt-get remove zscaler-clientsudo apt-get purge zscaler-client
If the Zscaler Client Connector was already installed on the system with the Zscaler run file and a user wants to install the Zscaler Client Connector Debian package, first uninstall the Zscaler run file before installing the Debian package.
Close
- Downloading and Installing with RPM
RPM is a package management system that runs on Red Hat Enterprise Linux (RHEL), CentOS, and Fedora. You can use RPM to distribute, manage, and update software that you create for any of these operating systems. RPM simplifies the distribution of software because RPM packages are standalone binary files, similar to compressed archives.
Zscaler Client Connector for Linux supports the following RPM distributions: RHEL, Fedora, CentOS, and openSUSE. The Zscaler Client Connector Linux RPM package is a
.tarfile, i.e.,zscaler-client–<release version>-rpm.tar, and contains two files that perform the following tasks:Zscaler_package_installation.sh: Zscaler Client Connector installation requires different dependencies based on the respective distribution. This script identifies the distribution and installs the corresponding dependencies.Zscaler-client-<release version>-1.x86_64.rpm: This file installs Zscaler Client Connector binaries in each system.
To download and install the CLI version of the RPM Package for Zscaler Client Connector version 3.7.1 and later for Linux, follow these steps:
- Obtain the Zscaler Client Connector RPM package from your IT administrator.
- Copy the
.tarfile to the Linux endpoint device and unzip the package using the following command:tar -xvf zscaler-client-3.7.1.51-rpm.tar

- Run the following installation script to install all dependencies for Zscaler Client Connector:
sudo ./zscaler_package_installation.sh install_dependency_libs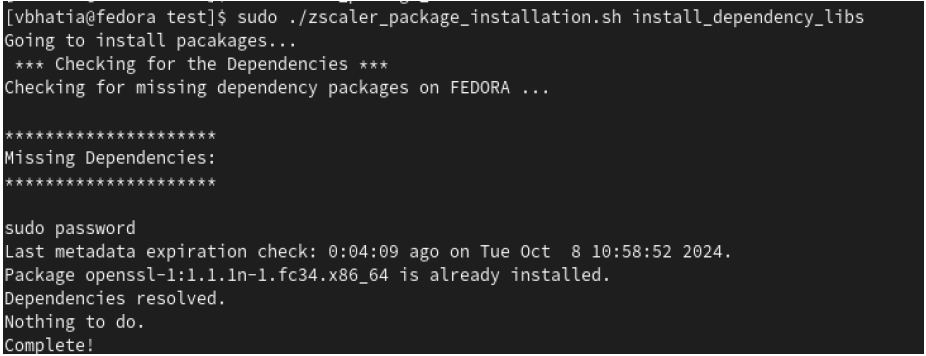
- Install the RPM package using one of the following commands, depending on the distribution you’re using:
- For Fedora, RHEL, and CentOS, use one of the following commands:
sudo dnf install zscaler-client-3.7.1.51-1.x86_64..rpmsudo yum install zscaler-client-3.7.1.51-1.x86_64..rpm
- For openSUSE, use
sudo zypper install zscaler-client-3.7.1.51-1.x86_64..rpm
- For Fedora, RHEL, and CentOS, use one of the following commands:
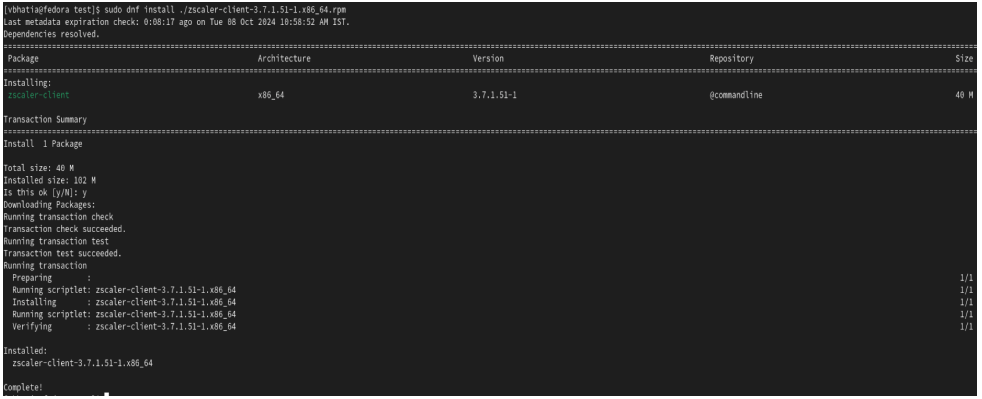
While the Zscaler Client Connector package installation script displays all missing dependencies on the system and installs the missing packages for Zscaler Client Connector, it doesn’t remove Zscaler Client Connector dependencies in the current release.
Close - Installing with Command-Line Options using the Zscaler Run File
You can install the package for Zscaler Client Connector from a terminal using specific Linux command-line options. For example:
sudo ./Zscaler-linux-1.0.0.108-installer.run <install options>Replace <install options> with one or more of the following options:
- --cloudName
With this install option, you can specify the cloud to which the app must send user traffic so your users won't make the selection during enrollment. Do not use this option if your organization is provisioned on one cloud. The app automatically sends traffic to the proper cloud.
This install option is required if you enable the
--strictEnforcementoption.To add this option using the CLI, enter --cloudName <organization's cloud name in lowercase>. For example, if your cloud name is zscalertwo.net, you would enter zscalertwo.
Close - --deviceToken
The --deviceToken install option only applies to Internet & SaaS. It is not supported by Private Applications.
This install option allows you to use Zscaler Client Connector as an IdP. The Zscaler service silently provisions and authenticates users even if you don't have an authentication mechanism in place. Before adding this option, you must generate a device token in the Admin Portal and complete the full configuration detailed in Using Zscaler Client Connector as an IdP.
To add this option using the command line, enter --deviceToken <device token from the Admin Portal>.
Close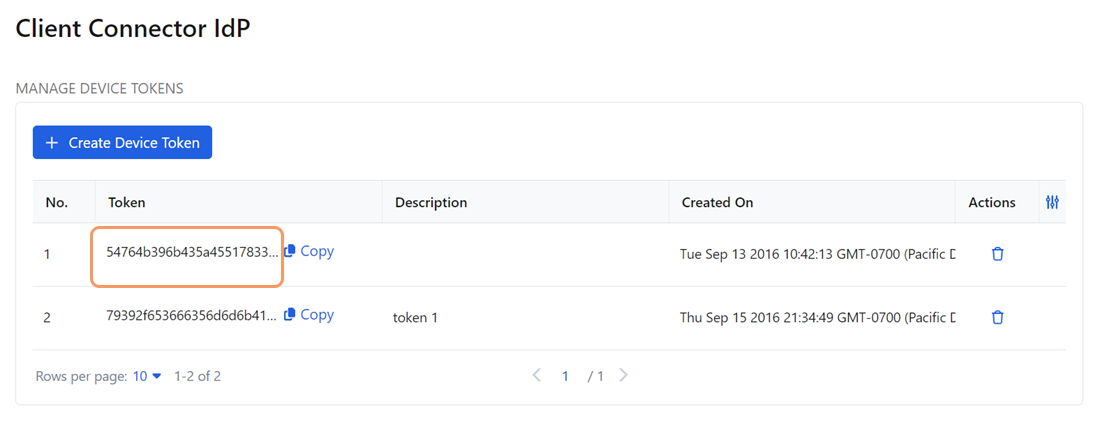
- --hideAppUIOnLaunch
This install option forces the app window to stay hidden before users enroll. Users can always open the window by clicking the app icon in the system tray.
To enable this option using the command line, enter --hideAppUIOnLaunch 1. By default, the value is 0 (i.e., disabled).
Close - --policyToken
This install option allows you to specify which app profile policy you want to enforce for the app before the user enrolls. All relevant settings associated with the policy apply, including the bypass of the IdP login page. After the user enrolls, this policy is replaced with the app profile policy that matches the user based on group affiliation.
Prerequisites:
- This install option is only applicable, and required, if you enable the --strictEnforcement option and want users to enroll with the app before accessing the internet.
- In the Admin Portal, you must configure the app profile policy that you want to enforce and ensure that the custom PAC file associated with that policy includes a bypass for your IdP login page. This allows the user to access the IdP page to log in as necessary before enrolling with the app.
To add this option using the command line, enter --policyToken <policy token from the Admin Portal>.
Close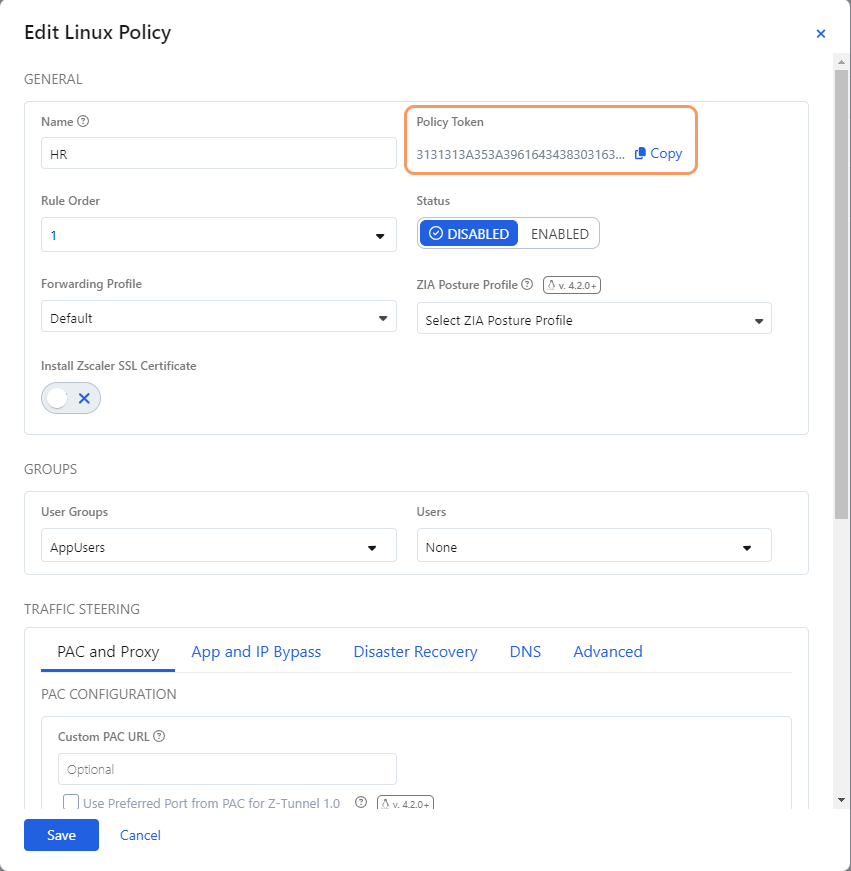
- --strictEnforcement
This install option only works when the forwarding profile action for Zscaler Client Connector is Tunnel or Tunnel with Local Proxy. To learn more, see Configuring Forwarding Profiles for Zscaler Client Connector.
This install option allows you to require users to enroll with the app before accessing the internet and blocks traffic in the following situations:
- The user has not yet logged in after a new install.
- A user logs in and logs out.
- An administrator removes a device.
This install option does not affect users that remain logged in and disable the Internet & SaaS service.
If you enable this install option, the
--cloudNameand--policyTokenoptions are required.To enable this option using the command-line, enter --strictEnforcement 1. By default, the value is 0 (i.e., disabled).
Close - --userDomain
This install option allows users to skip the app enrollment page. If SSO is enabled for your organization, users are taken directly to your organization's SSO login page. If you've integrated SSO with the app, users can also skip the SSO login page and are automatically enrolled in the Zscaler service and logged in.
To add the install option using the command line, enter --userDomain <your organization's domain>. If your instance has multiple domains associated with it, enter the primary domain for your instance.
Close - --enableFips
This install option allows you to enable the Federal Information Processing Standard (FIPS) mode for Zscaler Client Connector. By default, the value is 0 (i.e., disabled).
Close
For example:
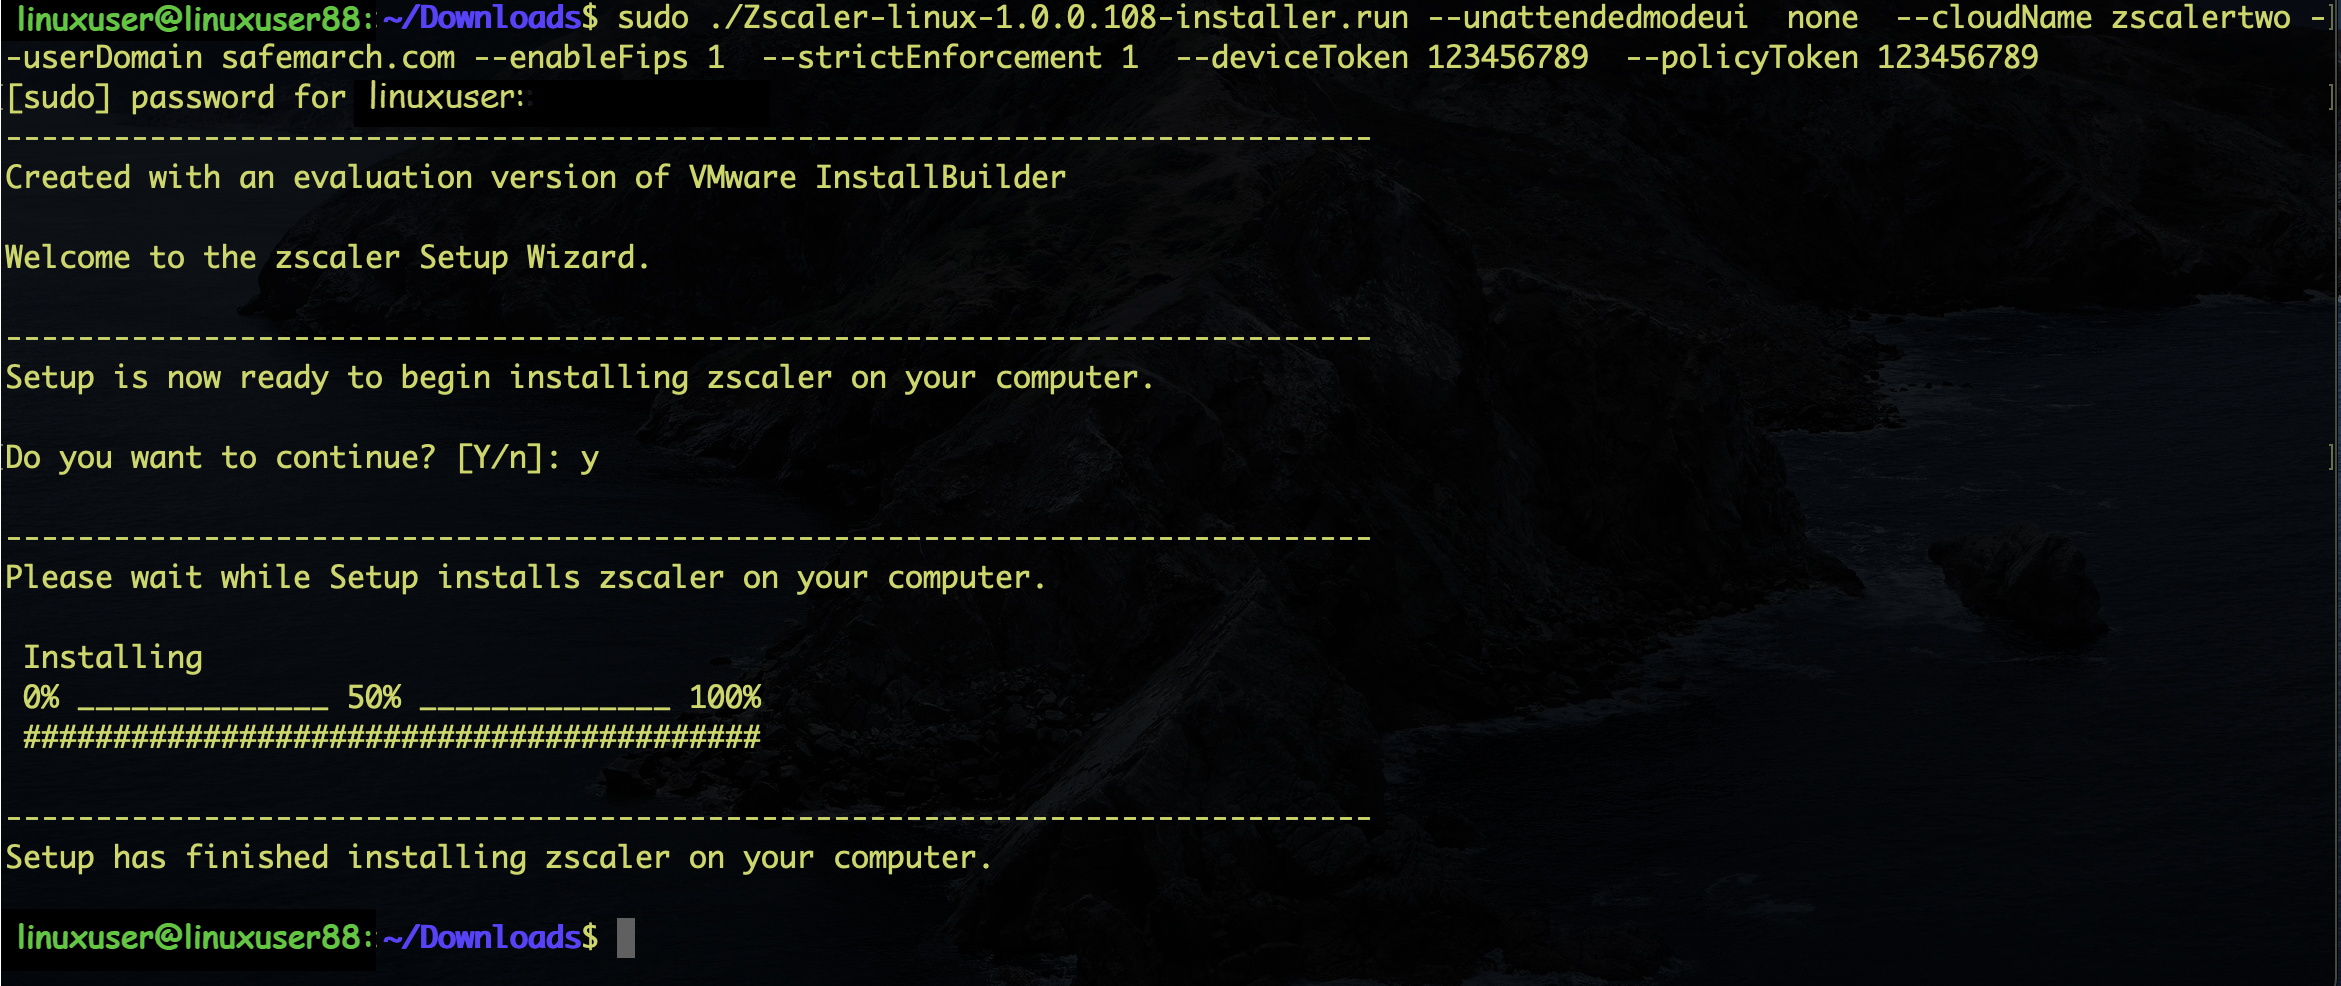
sudo ./Zscaler-linux-1.0.0.108-installer.run --hideAppUIOnLaunch 1 --cloudName zscalertwoThe following image is an example of a command that uses all the available installation options, where:
- The cloud on which the organization is provisioned is zscalertwo
- The device token value is 123456789
- The policy token value is 123456789
- The organization's domain name is safemarch.com
- --cloudName
- Providing Command-Line Options with the Debian Package
Only administrators can use
zscaler-configto edit the parameter configuration after the Debian package is installed on the system and requires root permission. Use thezscaler-configscript to edit the following parameters:- cloudName
- userDomain
- enableFips
- Help
- hideAppUIOnLaunch
- User password
- externalRedirect
- strictEnforcement
- policyToken
- deviceToken
- userName
- waitForInput
The
zscaler-configscript resides in the/usr/bindirectory. You can use this script in the following two ways:- Interactive Mode
Run
zscaler-configwithout parameters (e.g.,sudo zscaler-config). You are prompted with a series of questions to set the parameters, as shown in the following image:
Close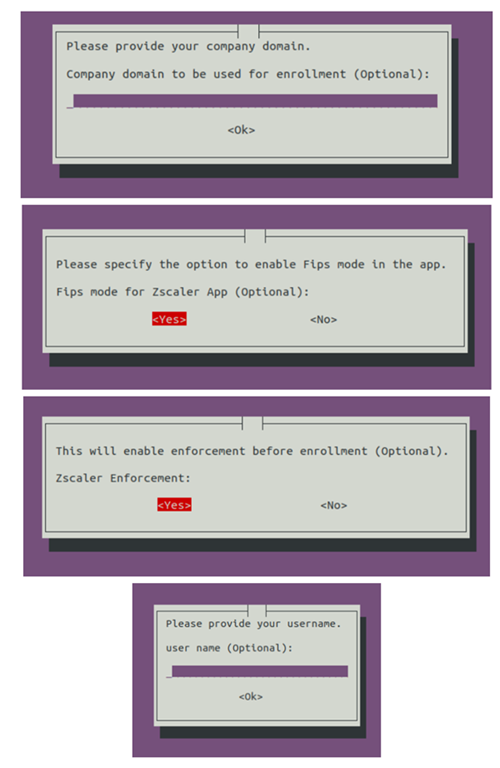
- Silent Mode
You can change the order of parameters without any UI prompting. For example, you can use the following commands in the following combinations to edit parameters.
- command: sudo zscaler-config -h
- When to use: To see parameter help
- Output: Usage
zscaler-config - [ -c Cloud Name ] [-d User Domain ] [ -f Enable Fips ] [ -h Help] [ -l hideAppUIOnLaunch ] [ -p User password ] [ -r externalRedirect ] [ -s strictEnforcement ] [ -t policyToken ] [ -T deviceToken ] [ -u username ] [ -w waitForInput ] zscaler-config - [ No Argument ] For UI based interaction zscaler-config - [ -c Cloud Name ][ String Argument ] zscaler-config - [ -d User Domain ] [ String Argument ] zscaler-config - [-f Enable Fips ] [ 0/1 ] zscaler-config - [ -h Help] zscaler-config - [ -l Hide App UI on Launch ] [ 0/1 ] zscaler-config - [ -p User Password ] [ Sring Argument ] zscaler-config - [ -r External Redirect ] [ 0/1 ] zscaler-config - [ -s Strict Enforcement] [ 0/1 ] zscaler-config - [ -S Disable sudo keyword inside the scripts] [ 0/1 ] zscaler-config - [ -t Policy Token ] [ String Argument ] zscaler-config - [ -T Device Token ] [ String Argument ] zscaler-config - [ -u User Name ] [ String Argument ] zscaler-config - [ -w Wait for Input ] [ 0/1 ]- command:
sudo zscaler-config -s 1 -t<Policy Token>-T<Device Token>-u<User Name>-u - When to Use: To set the value for
strictEnforcement,policyToken,deviceToken, andusername. - Output: None. The command writes data in the
/opt/zscaler/.config.inifile.
- Providing Command-Line Options with the RPM Package
Only administrators can use
zscaler-configto edit the configuration after the RPM package is installed on the system. It also requires admin privileges. Use thezscaler-configscript to edit the following parameters:- cloudName
- userDomain
- enableFips
- Help
- hideAppUIOnLaunch
- externalRedirect
- strictEnforcement
- policyToken
- deviceToken
- userName
- MAPubKey
The
zscaler-configscript resides in the/usr/bindirectory. You can use this script in the following combinations to edit these parameters:- command:
sudo zscaler-config -h - When to use: To see parameter help
- Output: Usage
- command:
sudo zscaler-config -s 1 -t<Policy Token> -T<Device Token>-u<User Name> - When to Use: To set the value for strictEnforcement, policyToken, deviceToken, and username.
- Output: None. The command writes data in the
/opt/zscaler/.config.inifile
Close
- Locating Logs
The following are locations where you can find related log information:
- Tray logs: <user home>/.Zscaler/Logs
- Zscaler system logs: /var/log/zscaler/.Zscaler/Logs
- Installer errors: /var/log/zscaler/zscaler-installation.log
