Experience Center
Creating Certificate Signing Requests for (Web Server) Certificates
In order to enable Browser Access for an application, you must upload its web server certificate. The certificate can be signed by a public certificate authority (CA) or be a self-signed certificate whose trust is established by your organization's PKI.
To create a CSR for a (web server) certificate:
- Go to Policies > Access Control > Clientless > Certificates.
- Click Create CSR.
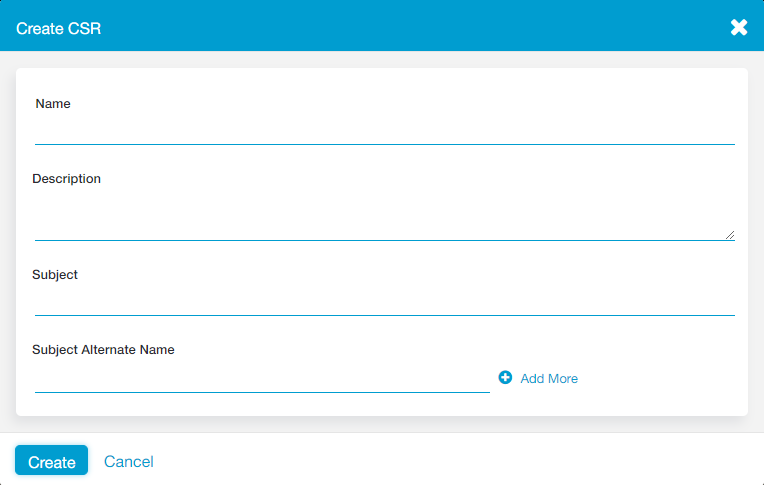
The Create CSR window appears.
- In the Create CSR window:
- Name: Enter a name for the CSR. The name cannot contain special characters, with the exception of periods (.), hyphens (-), and underscores ( _ ).
- Description: (Optional) Enter a description.
- Subject: Enter the subject distinguished name (DN) for the certificate, in the following format and order:
CN=<Common Name>,O=<Organization>,ST=<State>,C=<Country>,L=<Location>,OU=<Organizational Unit>
The CN=<Common Name> attribute must be listed first in the sequence, and all other attributes are optional. For example:
CN=*.mockcompany.com,O=MockCompany,ST=CA,C=US,L=SanJose,OU=ITDepartment
However, the common name does not need to be a wildcard domain.
- Subject Alternate Name: Enter the Subject Alternate Name (SAN) for the CSR. Specifying a SAN allows the certificate to cover multiple hostnames (domains only). Click + Add More to add multiple SANs.

- Click Create to generate content for the CSR.
- The Certificates page automatically updates to display your pending CSR in the table, where you must upload the web server certificate.