Experience Center
Configuring IPv6 Settings
To have IPv6 support provisioned for your organization, contact Zscaler Support. When IPv6 support is provisioned, IPv6-related configurations are made available in the Admin Portal.
Complete the following steps to configure IPv6 support:
- Step 1: Enable IPv6 for Your Organization
As a first step, you need to enable IPv6 support at the organization level in the Admin Portal to configure other IPv6-related settings.
To enable IPv6 support at the organization level:
- Go to Infrastructure > Internet & SaaS > Traffic Forwarding > IPv6 Configurations > Settings.
- Enable IPv6 by using the toggle button.
- Click Save.
CloseZscaler Client Connector over Z-Tunnel 2.0 may allow IPv6 traffic to the destination by bypassing the Zscaler service in the following cases:
- Zscaler Client Connector connects to a Zscaler data center that does not support IPv6 yet.
- IPv6 support has been disabled in the Admin Portal for your organization or the location where the user device is placed.
To prevent IPv6 traffic from bypassing the Zscaler service in these scenarios, you need to configure the Zscaler Client Connector to drop IPv6 packets. To learn more, see Configuring Forwarding Profiles for Zscaler Client Connector.
- Step 2: (Optional) Configure NAT64 and DNS64 Prefixes
If you are forwarding your organization's traffic using transparent proxy mode (via GRE/IPSec tunnels or using Zscaler Client Connector Tunnel 2.0), you can leverage Zscaler’s customized DNS64/NAT64 mechanisms to establish connections between IPv6 clients and IPv4 destinations. When using this option, you have the flexibility in selecting the IPv6 prefixes used for the DNS64/NAT64 mechanism. Zscaler facilitates this mechanism with its own default IPv6 prefixes and the well-known prefix (64:ff:9b::/96), without requiring any additional configurations by Internet & SaaS administrators. However, organizations can configure and use their network-specific DNS64 and NAT64 prefixes instead of the default prefixes supported by Zscaler. To learn more, see About the DNS64 Prefix and About NAT64 Prefixes.
To use custom prefixes, you need to complete the following configurations, matching your requirements:
If you are forwarding your organization's DNS traffic to the Zscaler service, you can configure custom NAT64 and DNS64 prefixes either globally or per location. In this case, you must configure both DNS64 and NAT64 prefixes as they are interdependent.
Both global and location-specific DNS64 prefixes are selected from the list of NAT64 prefixes (maximum limit of 128) configured under Infrastructure > Internet & SaaS > Traffic Forwarding > IPv6 Configurations > NAT64 Prefixes.
- You can configure the global DNS64 prefix under Infrastructure > Internet & SaaS > Traffic Forwarding > IPv6 Configurations > DNS64 Prefix. Only one global DNS64 prefix is allowed per organization. To learn the steps for this configuration, see Configuring the DNS64 Prefix.
- If you have IPv6 support enabled for known locations, you can also configure a DNS64 prefix for individual locations on the respective Location page. When configured, the location-specific prefix overrides the global prefix for a given location. To learn the steps for this configuration, see how to enable IPv6 for locations.
- If you are not forwarding your DNS traffic to the Zscaler service and are using an external service to perform DNS64, you do not need to configure a DNS64 prefix (globally or per location). However, you can still configure NAT64 prefixes to match the inbound traffic and perform the appropriate network address translation using the Zscaler service.
Configuring NAT64 Prefixes
To configure a NAT64 prefix for your organization:
- Go to Infrastructure > Internet & SaaS > Traffic Forwarding > IPv6 Configurations > NAT64 Prefixes.
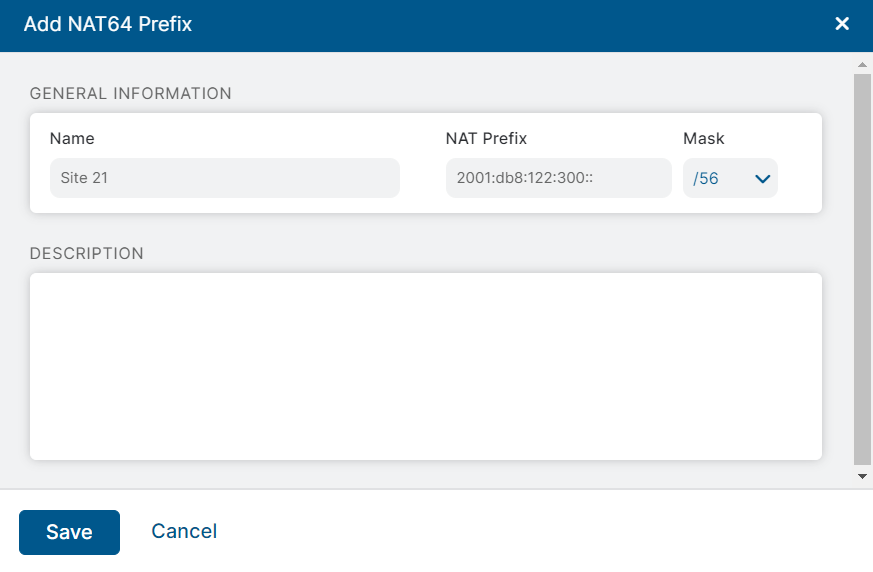
Click Add NAT64 Prefix.
The Add NAT64 Prefix window appears.
- In the Add NAT64 Prefix window:
- Name: Enter a name for the NAT64 prefix.
- NAT Prefix: Enter the well-known prefix for NAT64 (64:ff9b::/96) or a network-specific prefix.
- Mask: Select a subnet mask for the NAT64 prefix.
- Description: Enter a description for the NAT64 prefix.
- Click Save.
- You can add a maximum of 128 NAT64 prefixes for your organization.
- A NAT64 prefix that is designated as the DNS64 prefix cannot be deleted. When IPv6 support is disabled, the NAT64 prefixes are in view-only mode and no action can be performed.
Configuring the DNS64 Prefix
To configure the global DNS64 prefix for your organization, complete the following steps:
To learn how to configure the DNS64 prefix for a location, see how to enable IPv6 for locations.
- Go to Infrastructure > Internet & SaaS > Traffic Forwarding > IPv6 Configurations > DNS64 Prefix.
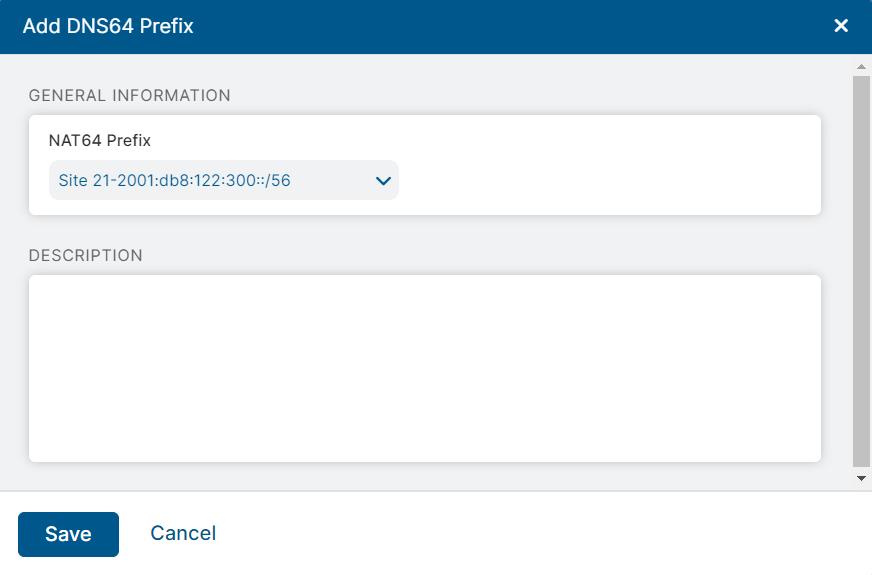
Click Add DNS64 Prefix.
The Add DNS64 Prefix window appears.
- In the Add DNS64 Prefix window:
- NAT64 Prefix: Select a NAT64 prefix from the list of NAT64 prefixes configured for your organization.
- Description: Enter a description for the DNS64 prefix.
- Click Save.
Close- The DNS64 prefix cannot be deleted. However, you can modify it by designating a different NAT64 prefix as the DNS64 prefix.
- When IPv6 support is disabled, the DNS64 prefix is in view-only mode and no action can be performed.
- Step 3: Enable IPv6 for Locations
To forward IPv6 traffic from specific organization locations to the Zscaler service, you need to enable IPv6 support for those locations and then set up GRE or IPSec tunnels to the Internet & SaaS Service Edge (Public, Private, or Virtual).
To enable IPv6 support for a location:
- Go to Infrastructure > Internet & SaaS > Traffic Forwarding > Location Management.
On the Locations tab, click the Edit icon beside a location. If you want to add a new location and configure IPv6 support for it, click Add Location.
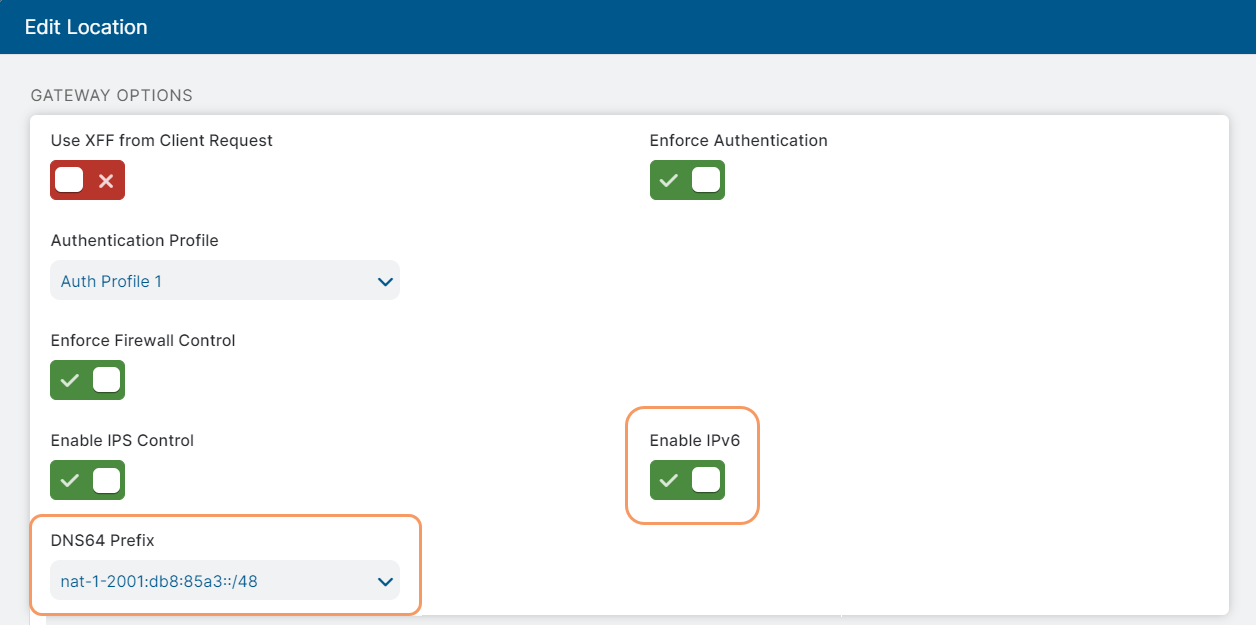
The Add/Edit Location window appears.
In the Add/Edit Location window, enable the IPv6 option using the toggle button. Optionally, you can select a DNS64 Prefix that must be used for this location from the list of prefixes configured for the organization. When selected, the location-specific prefix overrides the global (organization-level) prefix. If no prefix is selected, the global prefix is used.
If you are adding a new location, fill out the other necessary information.
- Click Save.
When you add a sub-location to the location, the Zscaler service automatically creates a new sub-location, namely Other6, for all IPv6 addresses that connect to the Zscaler service from that location. Creating sub-locations for specific IPv6 addresses or networks is currently not supported. To learn more, see Configuring Locations and Understanding Sub-Locations.
Close - Step 4: Configure Firewall Policy to Allow IPv6 Traffic
When IPv6 is enabled at the organization level, two new predefined firewall filtering rules are automatically created under Policies > Access Control > Firewall > Firewall Filtering Policy.
- The Block All IPv6 rule blocks traffic from all IPv6 clients, directed to any destination. You need to modify this rule to allow IPv6 traffic or create higher-order rules with granularity to allow IPv6 traffic that matches specific conditions.
- The Allow IPv6 DNS Traffic rule facilitates the DNS traffic from IPv6 clients sent via Zscaler Client Connector to reach the Internet & SaaS Service Edges.
These rules use Source IP address conditions and do not affect destination-based IPv6 traffic. Zscaler recommends assigning the lowest precedence to these rules, following the Default Firewall Filtering Rule. To learn more, see Understanding Predefined Firewall Filtering Rules.
Additionally, the DNS optimization settings for IPv6 connections are automatically enabled for all URL categories and cloud applications in the Advanced Settings.
After making the necessary changes to the Admin Portal in this step and the preceding steps, ensure that you save and activate your changes.
Close - Step 5: Configure Forwarding Methods for IPv6 Traffic
Depending on the traffic forwarding methods used by your organization, you need to configure certain additional settings to send IPv6 traffic to the Zscaler service, explained as follows:
- GRE Tunnel
You can send IPv6 traffic within an IPv4 GRE tunnel without any additional configurations. To learn more, see Configuring GRE Tunnels.
Close - IPSec VPN Tunnel
Configure IPv6 traffic selectors for both IKEv1 and IKEv2 on your edge router or firewall to tunnel IPv6 traffic. To learn more, see Configuring an IPSec VPN Tunnel.
Close - Zscaler Client Connector
When using Zscaler Client Connector, you must ensure that your users' IPv6 traffic is forwarded only to data centers in the IPv6-enabled subcloud managed by Zscaler. You can do this by configuring a custom PAC file and using it with your App Profile. The PAC file can also be customized to forward the traffic to the nearest IPv6 data centers.
Use the following gateway variable to specify the subcloud in the PAC file:
${GATEWAY.<Subcloud>.<Zscaler cloud>}, where you must replace:<Subcloud>withipv6, which is the DNS name of the public subcloud provisioned by Zscaler.<Zscaler cloud>with the name of the Zscaler cloud on which your organization is provisioned.
An example would be
${GATEWAY.ipv6.zscalertwo.net}. To learn more, see Writing a PAC File and Understanding Subclouds.Configure the following settings:
These configurations are applicable to Z-Tunnel 2.0 unless otherwise specified.
- In the Zscaler Client Connector forwarding profile:
- (Mandatory) Disable the Drop IPv6 Traffic option to prevent Zscaler Client Connector from intercepting and dropping IPv6 traffic. This configuration is applicable to both Z-Tunnel 2.0 and Z-Tunnel 1.0.
(Recommended) Enable the Drop IPv6 Include Traffic When not supported option to drop IPv6 traffic that matches the destination inclusion if IPv6 is not provisioned for the company or the Internet & SaaS Service Edge.
To learn more, see Configuring Forwarding Profiles for Zscaler Client Connector.
In the Zscaler Client Connector app profile policy rule:
- (Mandatory) Configure Destination Inclusions for IPv6 and Destination Exclusions for IPv6 to send a specific subnet of traffic to the Internet & SaaS Service Edge through Z-Tunnel 2.0. IPv6 routes are not added by default to the inclusion settings, so you need to explicitly add all destination inclusions, including [2000::/3] that sends traffic from all publicly routable IPv6 addresses.
- (Recommended) As a best practice, Zscaler recommends sending all your DNS traffic through the Zscaler service. To do this, enter
*in the Domain Inclusions for DNS Requests field. - (Optional) Set the Disable Parallel IPv4 and IPv6 DNS requests option to None to prevent Zscaler Client Connector from modifying the existing system settings for parallel IPv4 and IPv6 DNS requests.
To learn more, see Configuring Zscaler Client Connector Profiles.
- PAC File
Configure the
Close${Gateway_Host}variable, which is a Zscaler-specific variable, in the PAC file. To learn more, see Writing a PAC File.
Forwarding IPv6 traffic to Internet & SaaS Private Service Edges and Internet & SaaS Virtual Service Edges is supported only via GRE and IPSec tunnels. To learn more, see Deploying Internet & SaaS Private Service Edge and Forwarding Traffic to Internet & SaaS Virtual Service Edges.
Close - GRE Tunnel
After configuring the IPv6 settings, you can observe the new IPv6-specific fields introduced in Firewall Logs and Web Logs. For example, Web Logs display a Client IP filter that you can use to narrow down transactions made by devices with IPv4 addresses, IPv6 addresses, or both by using the respective options. To learn more about IPv6-specific filters, see Web Insights Logs: Filters and Firewall Insights Logs: Filters.
You can also query the DNS64 logs by using the DNS Request Type filter set to IPv6 Address. This filter queries the AAAA DNS request/response types sent through the Zscaler service. To learn more about IPv6-specific DNS log filters, see DNS Insights Logs: Filters.
After configuring the necessary IPv6 settings, you can start managing your IPv6 traffic by using Zscaler's security policies. To learn more about IPv6 support, see Understanding IPv6 Support.


