Experience Center
Configuring the Caution Notification
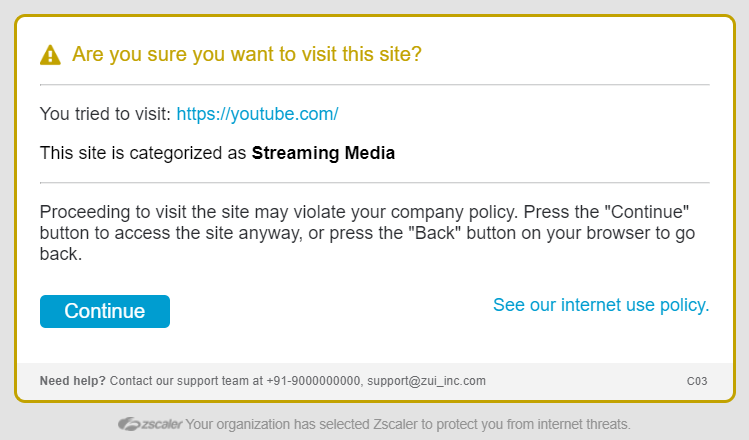
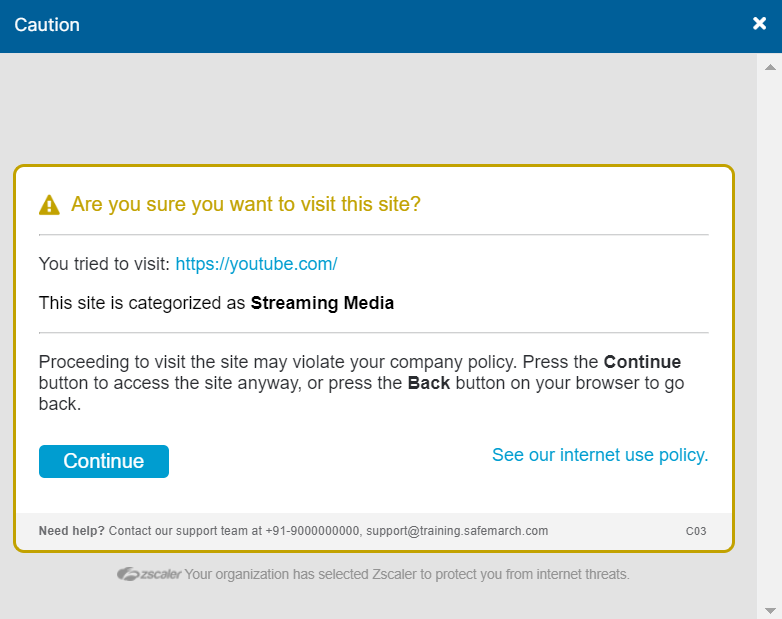
You can configure URL filtering rules for specific URL categories to caution users about accessing sites that might conflict with your corporate internet usage policy. The caution notification includes an option to allow users to continue accessing the site by acknowledging that visiting the site might violate your corporate internet usage policy.
The caution end user notification (EUN) has a default template, which you can customize per your requirements. You can also configure additional notification settings, such as the time interval at which the caution notification must be displayed for a user who accesses a restricted site, whether the caution notification must be displayed when a user accesses a URL in the Miscellaneous or Unknown URL category, IT Support information, etc.
To configure the caution notification:
- Go to Policies > Common Configuration > Resources > End User Notifications > Browser > Global Configuration.
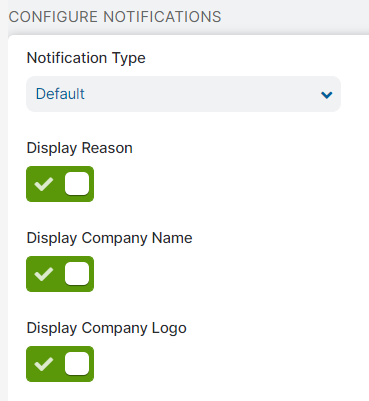
- Under Configure Notifications, choose the Notification Type, and configure accordingly:
- Default
Choose Default to display the system-generated message. Then, do the following:
- Display Reason: Enable to display why access to a site, file, or application was blocked or restricted in the end user notifications. This setting affects the block notifications.
- Display Company Name: Enable to display the name of your organization in the end user notifications. This setting affects the block notifications.
- Display Company Logo: Enable to display the logo of your organization in the end user notification. You can upload your company logo on the Company Profile page. This setting affects the block notifications.
If you choose to disable these settings, the changes are not reflected in the previews of the templates, but the changes are seen by your users after you save them.
Close - Custom
Choose Custom to redirect to an external site. The following option appears:
Redirect URL: Enter the redirected URL that hosts the notification. When the user's browser is redirected, the URL includes query parameters, which administrators can use to customize the page that is served or for logging purposes. During the redirection, all query parameters are sent to the external site. For Web DLP Violation policy requests, the query parameters enable the administrator to find the Web Post DLP transaction. These query parameters are:
action: Specifies the action that triggered the redirect. The action can be block or caution.cat: Specifies the URL category of the URL, if available.kind: Specifies the policy that triggered the URL redirection.- See a table of possible kind values and their mapping to policiesClose1 to 10 of 19. Page 1 of 21 to 10 of 19 Page 1 of 2
- See a table of possible kind values and their mapping to policies
reason: Specifies the string that contains additional information about the URL.- See a table of possible caution notificationsClose1 to 10 of 82. Page 1 of 91 to 10 of 82 Page 1 of 9
- See a table of possible caution notifications
reasoncode: Specifies the reason that this notification or redirect triggered.referer: Specifies the referer URL in URL-encoded format.rule: Specifies the internal rule-id that triggered the caution, if available.timebound: Specifies whether this notification or redirect is triggered by a policy that includes time interval as a criterion.url: Specifies the original URL that caused this redirect or notification.user: Specifies the user-id (the login name) of the user, if available.locid: Specifies the internal name of the location configured in the Admin Portal from which the traffic is originating.lang: Specifies the language in which the site is displayed.zsq: Specifies the parameter used by the Zscaler service.
The following is an example of the redirect URL:
https://redirectpage.com/?url=https://www.gambling.com/&referer=&reason=Not+allowed+to+browse+Gambling+category&reasoncode=CATEGORY_DENIED&timebound=1&action=deny&kind=category&rule=322760&cat=Gambling&user=user@domain.tld&locid=00000000&lang=fr_FR&zsq=JDspV0Ft81ZLq0j55Z0FsFsL6n0VSDV0F86pDD6zsq
To create a custom AUP or EUN for specific websites:
- Customize the following sample code:
<?php
$url = $_GET['url'];
$referer = $_GET['referer'];
$reason = $_GET['reason'];
$reason_code = $_GET['reasoncode'];
$timebound = $_GET['timebound'];
$action = $_GET['action'];
$kind = $_GET['kind'];
$rule = $_GET['rule'];
$cat = $_GET['cat'];
$user = $_GET['user'];
$lang = $_GET['lang'];
$zsq = explode("zsq", $_GET['zsq']);
?>
For example:
<?php
$url = $_GET['https://www.gambling.com'];
$referer = $_GET[''];
$reason = $_GET['Not+allowed+to+browse+Gambling+category'];
$reason_code = $_GET['CATEGORY_DENIED'];
$timebound = $_GET['1'];
$action = $_GET['deny'];
$kind = $_GET['category'];
$rule = $_GET['322760'];
$cat = $_GET['Gambling'];
$user = $_GET['user@domain.tld'];
$lang = $_GET['fr_FR'];
$zsq = explode("JDspV0Ft81ZLq0j55Z0FsFsL6n0VSDV0F86pDD6zsq", $_GET['JDspV0Ft81ZLq0j55Z0FsFsL6n0VSDV0F86pDD6zsq']);
?>
- To create the Continue button, customize the following sample code by replacing the generic <Zscaler cloud Name> in the form action with your tenant Zscaler cloud name.
<form id="continue_action" method="GET" action="https://gateway.<Zscaler cloud>:443/_sm_ctn"> <input type="hidden" name="_sm_url" value="<?php $_GET['url'];?>"> <input type="hidden" name="_sm_rid" value="<?php split('zsq', $_GET['zsq']);?>"> <input type="hidden" name="_sm_cat" value="<?php $_GET['cat'];?>"> <input type="submit" value="Continue" id="submitButton"> </form>- Upload the file to a web server.
- Configure your policy with a custom category containing the website or categories in question, and set the action to Caution with a Redirect URL set to the page you uploaded.
If users try to access a website that is set to caution and using a custom URL, the service redirects the users to your hosted custom caution notification.
You can customize the redirected page that hosts custom caution notification, such that the service redirects the users to their requested site, using methods such as a Continue button, a CAPTCHA, etc.
Close
- Default
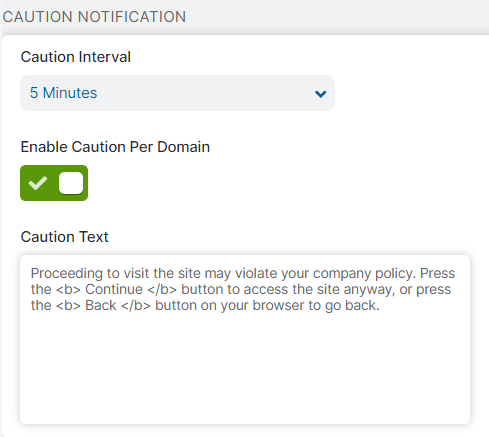
- Under Caution Notification:
Caution Interval: Choose how often the service displays the caution notification when a user is browsing a restricted site. For example, if you choose 5 minutes, the service displays the caution notification every 5 minutes while the user is browsing a restricted site. The recommended setting for complex websites, like Social Networking sites, is at least 5 minutes.
Another example would be, if a URL filtering rule is configured with the caution action for multiple URL categories, the caution interval is applied for URLs across the categories. For example, if a URL filtering rule is configured with the caution action for Travel and Online Shopping categories and the caution interval is set to 15 minutes, the service displays the caution notification when a user accesses a URL in either of the two categories for the first time. However, the service would not show the caution notification for any other URLs accessed by the user in either category until 15 minutes have elapsed.
If you have Enforce Authentication disabled for a location or sub-location, then you must select Enable Caution for the location, and set the Caution Interval to be greater than 1 minute to allow the service to display caution notifications to unauthenticated users. To learn more, see Configuring Locations.
Enable Caution Per Domain: For URLs in the Miscellaneous or Unknown category, you can select the option to display the caution notification at the specified caution interval for a URL or a sub-domain of a URL when a user browses the URL or the sub-domain of a URL in the Miscellaneous or Unknown category.
For example, when a user visits a URL in the Miscellaneous or Unknown category, the service displays a caution notification. If the user goes to the same URL or a sub-domain of that URL within the specified caution interval of 5 minutes, the service does not display the caution notification until 5 minutes is elapsed. However, if the user visits another URL or a sub-domain of a URL in the Miscellaneous or Unknown category for the first time, the service displays the caution notification.
This feature can be used with AI/ML-based Content Categorization enabled in advanced URL policy settings.
Caution Text: Enter the text that must appear in the caution notification. This text box contains the default message displayed by Zscaler in the caution notification, which you can view and customize. You can use HTML, CSS styles, and JavaScript to customize the text. To learn more, see Customizing EUNs with CSS Styles.
In addition to the notification text configured here, the caution notification includes texts that are auto-generated when users visit sites that may violate your organization's usage policies. You cannot modify these auto-generated texts but you can customize the appearance of the texts or hide them with CSS styles.
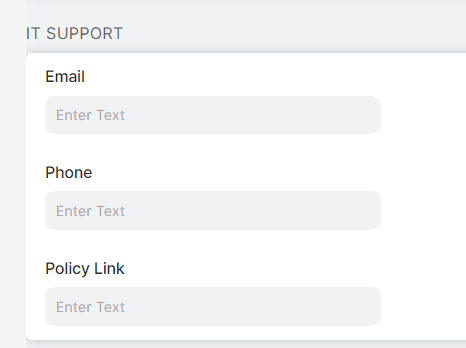
Under IT Support, enter one or more of the following contact details so users can seek additional information about the policy action taken:
- Email: Enter an email address to which your users reach out to learn and understand your company's IT security policies.
- Phone: Enter a phone number to allow users to contact you to learn and understand your company's IT security policies.
- Policy Link: Enter the URL of your organization's page that describes your current policy on using the corporate network and internet resources.
This section is applicable only for the default notification type. The options within this section are also applied to the Acceptable Use Policy and block notifications.
Click Preview Template(s) to see what the caution notification looks like to users after making changes.
CSS style and JavaScript don't render when previewing EUN templates.
- Click Save and activate the change.
