Experience Center
Configuring Browser Protection Profiles
Within the Admin Portal, you can add Browser Protection profiles to use in Browser Protection policies. For a complete list of ranges and limits for Browser Protection profiles, see Ranges & Limitations.
To add a Browser Protection profile:
- Go to Policies > Cybersecurity > Inline Security > Protection Profiles.
- Click Add Browser Protection Profile.
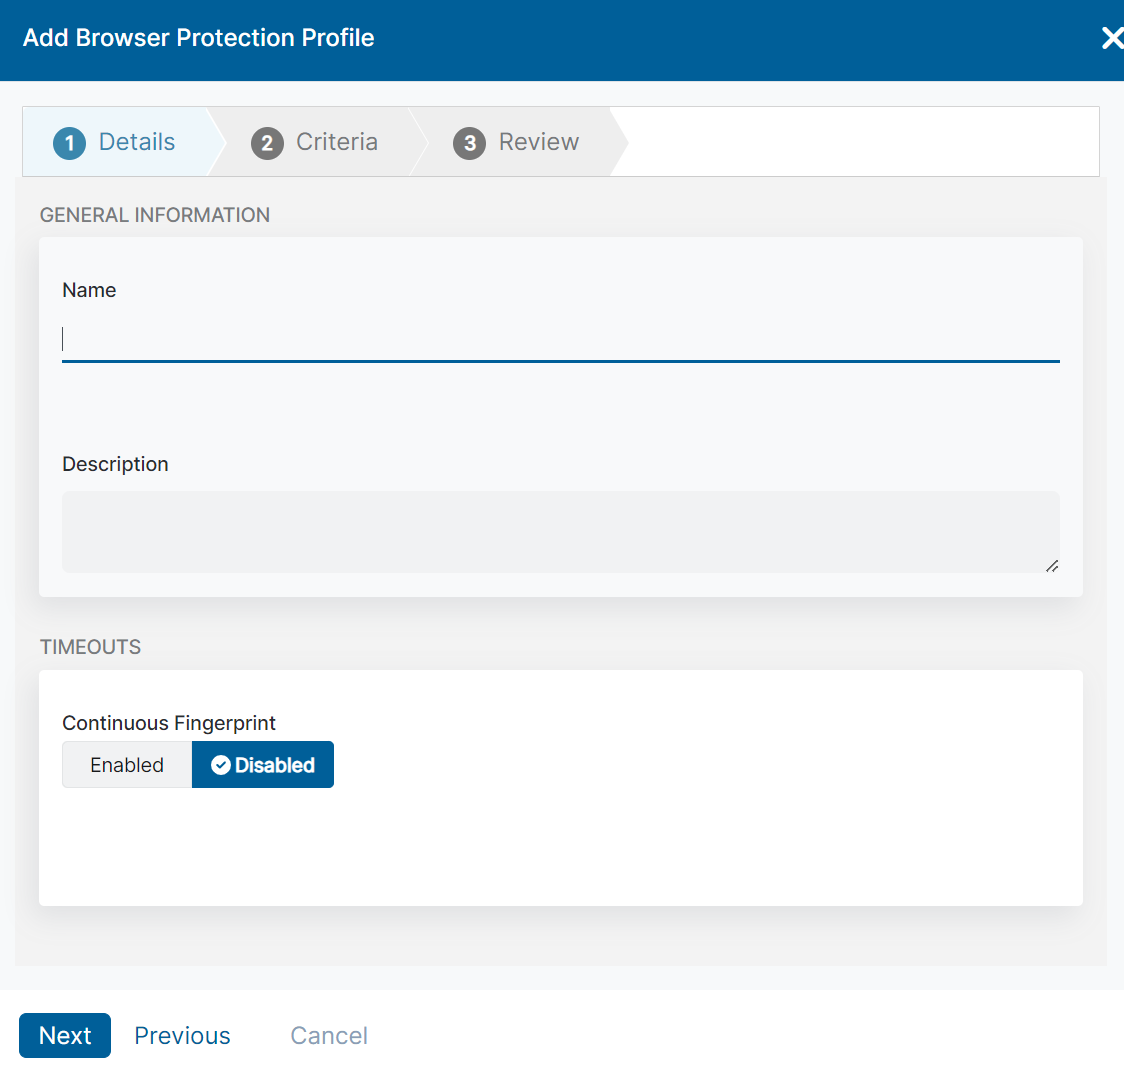
The Add Browser Protection Profile window appears. - In the Add Browser Protection Profile window, enter the following information:
- Step 1: Details
- Name: Enter a name for the Browser Protection profile. The name cannot contain special characters, with the exception of periods (.), hyphens (-), and underscores ( _ ).
- Description: (Optional) Enter a description.
- In the Timeouts section, enable Continuous Fingerprint to continuously monitor the users' browser access fingerprints assigned to this Browser Protection profile during a session. The default time limit for the timeout is 5 minutes and the maximum time limit is 24 hours. The time interval set is the minimum amount of time before the next fingerprint is captured again for a domain. Continuous Fingerprint is disabled by default.
- Click Next.
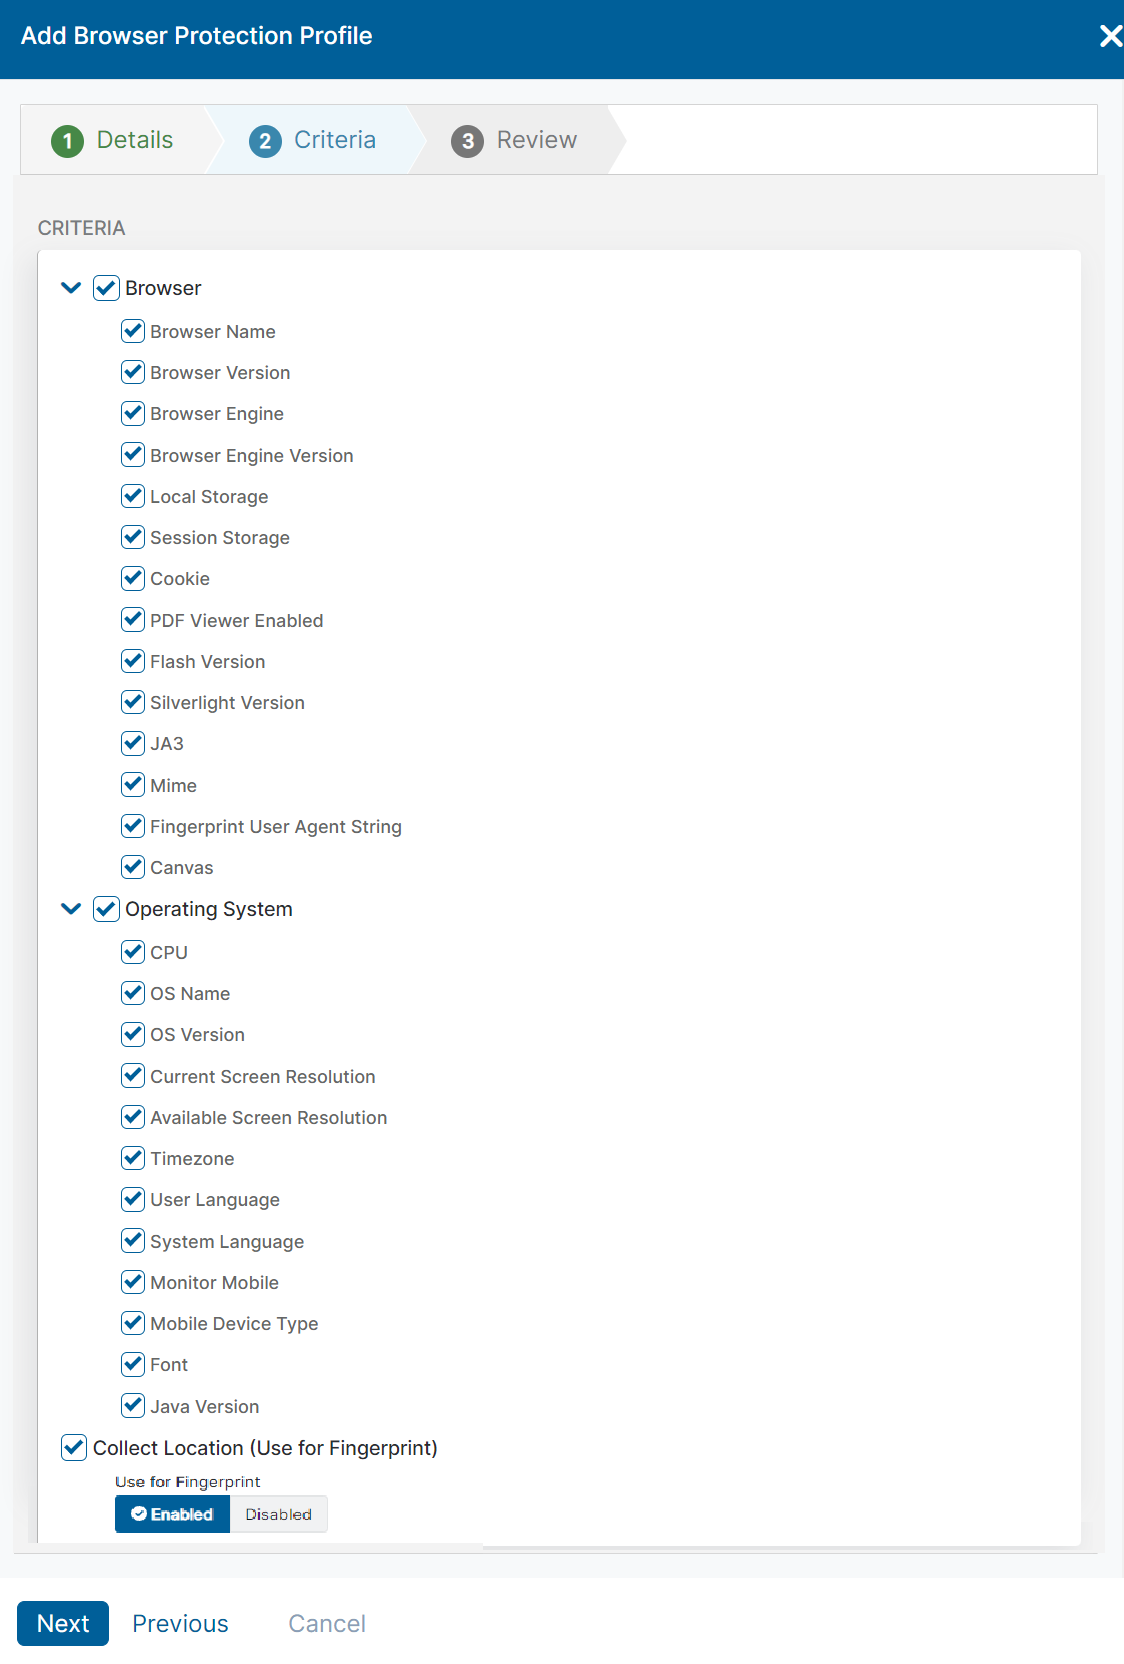
- Step 2: Criteria
- Select the criteria that you want to assign to the Browser Protection profile in the Criteria section:
- Browser: Select the browser attributes you want to include in the Browser Protection profile.
- Operating System: Select the operating system attributes you want to include in the Browser Protection profile.
- Collect Location: Select the checkbox to capture the monitored user's geolocation.
If you select the checkbox, a notification appears.

- Click Next.
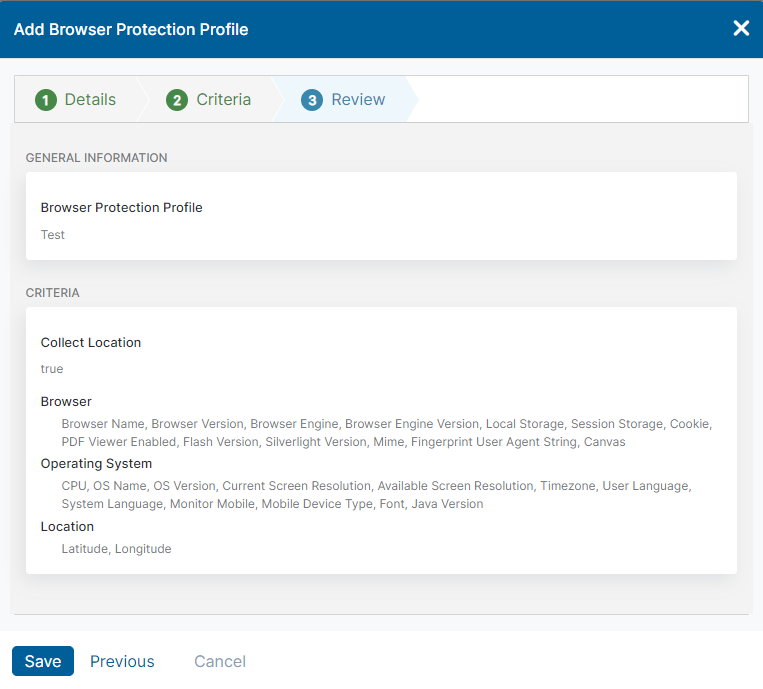
- Step 3: Review
- Click Save.


