Experience Center
Configuration Guide for Okta
This guide provides information on how to set up Okta as an IdP for Private Applications.
Prerequisites
Ensure that you have the following:
- An Okta account with admin privileges
- A Private Applications account with an administrator role that allows you to add an IdP Configuration
Configuring Okta for SSO
To configure Okta as the IdP for a Private Applications user and admin SSO:
- Log in to the Okta portal as an administrator.
- Within the top banner, make sure that Classic UI is selected from the drop-down menu.
You may only see the Classic UI if you are in the Okta developer dashboard.
- Go to Applications from the top menu.
- Click Add Application.
See image. - In the search toolbar, search for Zscaler Private Access 2.0. When the application appears, click Add.
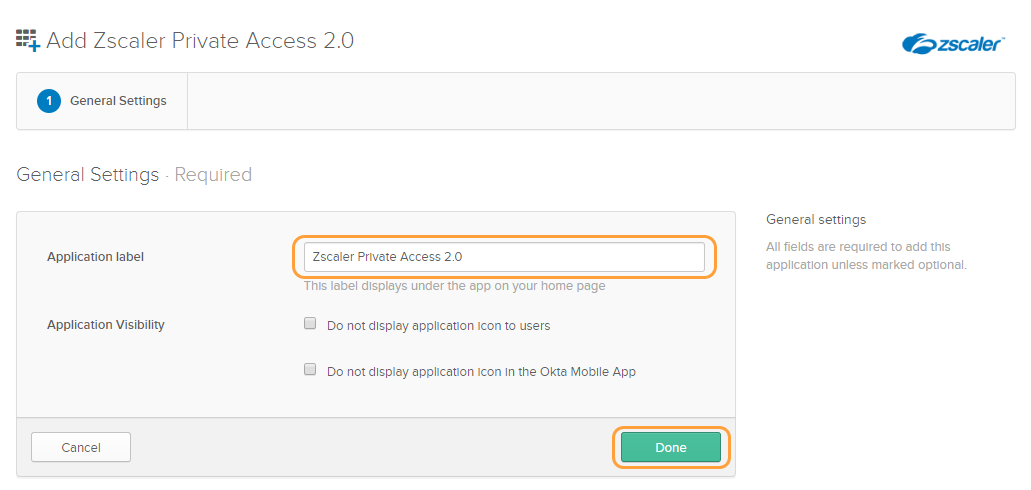
See image. - On the General Settings page that appears:
- For Application label, make sure that Zscaler Private Access 2.0 is entered.
- Click Done.
See image.
- On the Assignments page that appears:
- Select Assign > Assign to People or Assign to Groups.
See image. - In the window that appears, click Assign for the user or group you want to select, then click Save and Go Back.
- Repeat step b for all users and groups you want to assign to the Private Applications application, then click Done.
- Select Assign > Assign to People or Assign to Groups.
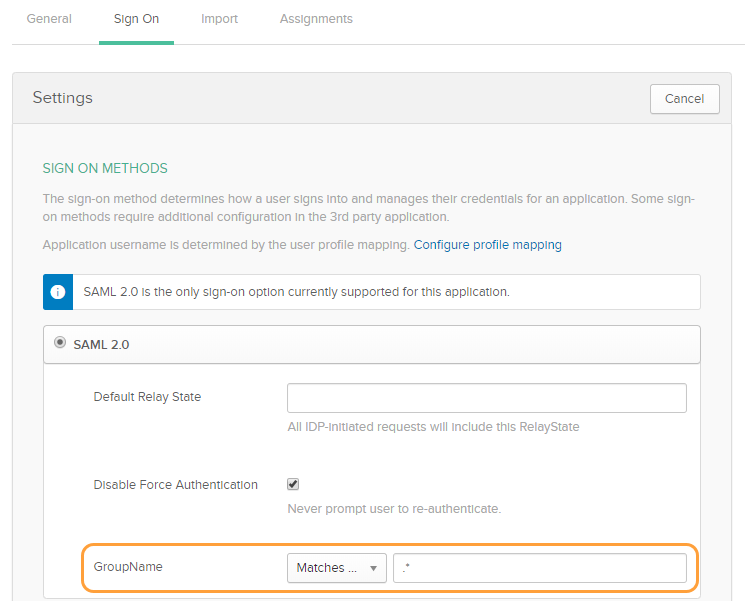
- Go to the Sign On page, click Edit, and complete the following fields. You must use the SAML 2.0 sign-on option for this application:
- (Optional) If you want to pass Okta group information as part of the SAML response:
- From the GroupName drop-down menu, select your preferred group filter (e.g., Matches Regex).
- Type in the applicable value for the group filter in the text field.
- (Optional) If you want to pass Okta group information as part of the SAML response:
For example, selecting Matches Regex and entering .* sends information for all Okta groups to Private Applications within the SAML response.
- Click the Identity Provider metadata hyperlink to download the IdP's metadata file. You will need this file later in order to complete the configuration within the Admin Portal.
See image. - For Service Provider URL, the URL that is provided for you when you configure a new IdP configuration in the Admin Portal. This URL is specific to your IdP.
- For Service Provider Entity ID, enter the ID that is provided for you when you configure a new IdP configuration in the Admin Portal. This ID is specific to your IdP.
See image. - Click Save.
- Go to the Admin Portal and complete the IdP configuration set up.
- (Optional) If you are configuring Okta for user SSO and want to use SCIM, proceed to the SCIM Configuration Guide for Okta.
After configuring your IdP, be sure to verify the configuration.


