Zero Trust Device Segmentation
Adding a Border Gateway Protocol to a Site
A border gateway protocol (BGP) governs routing among devices within a site.
To add a BGP configuration:
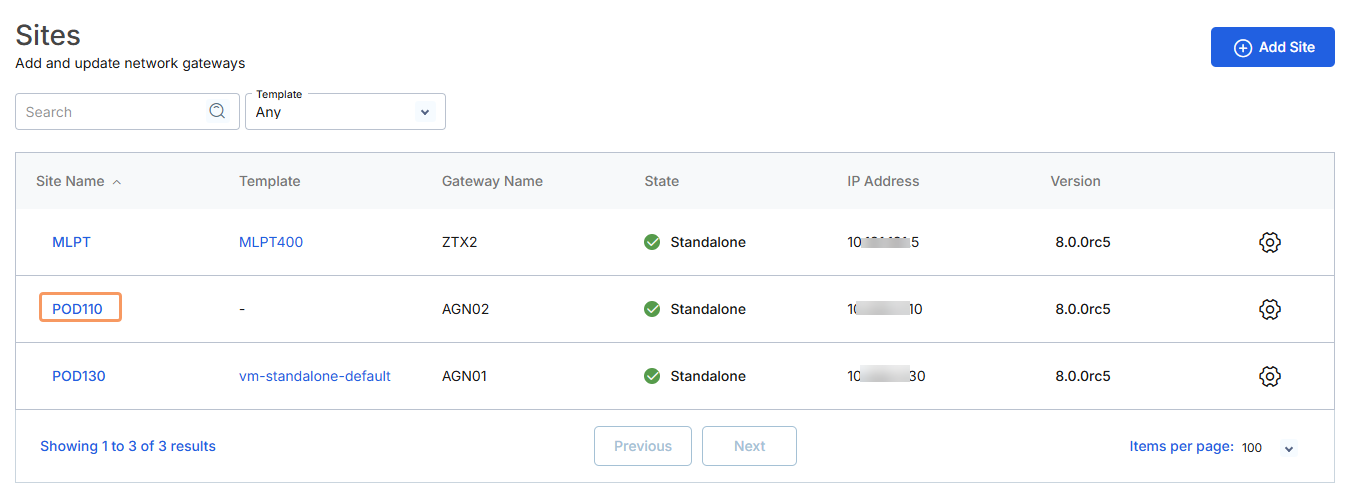
- Go to Deployment > Sites.
In the Site Name column, click the name of the site to which you want to add a BGP configuration.
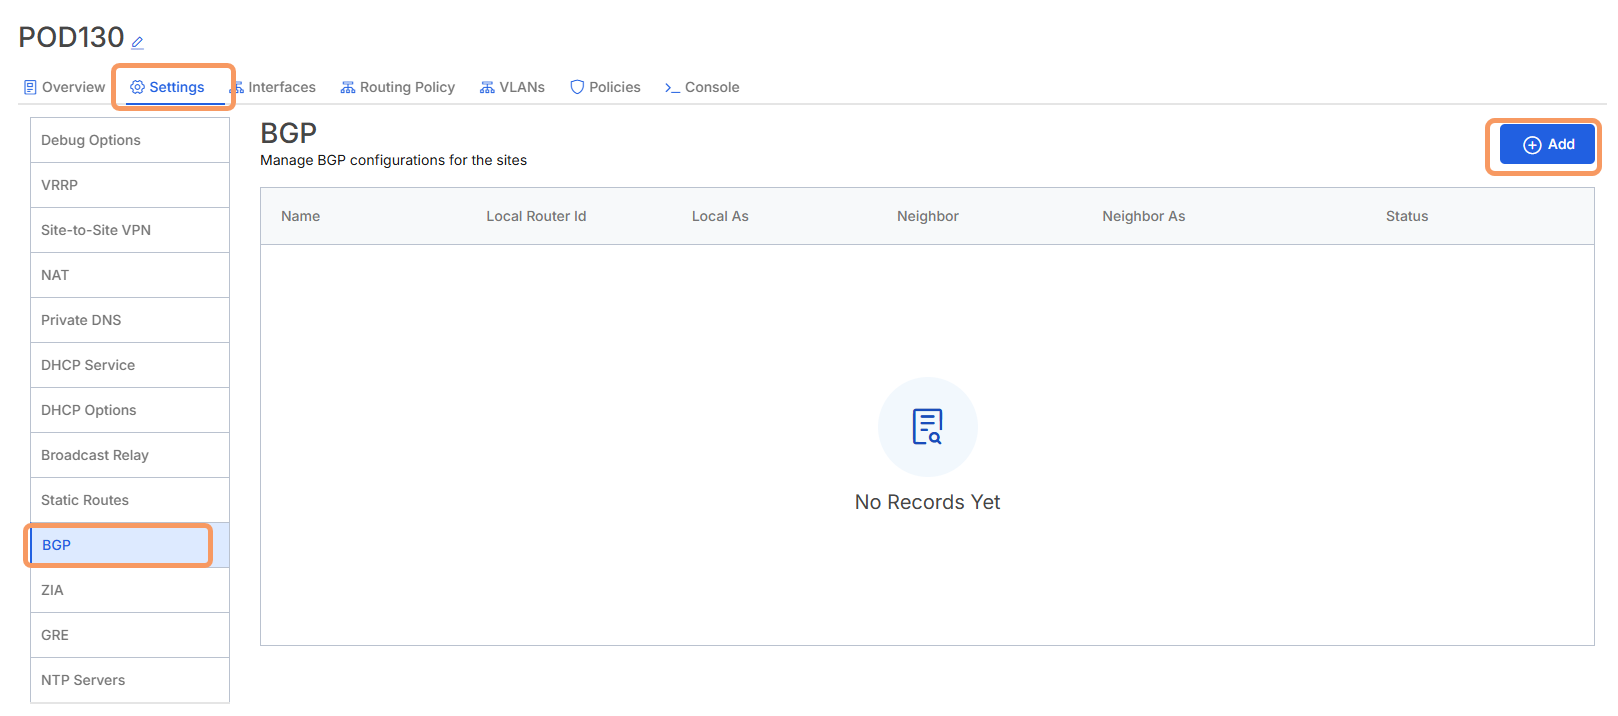
On the site details page, click the Settings tab, then click BGP in the left-side navigation. Click Add in the upper-right corner to add a new BGP configuration.
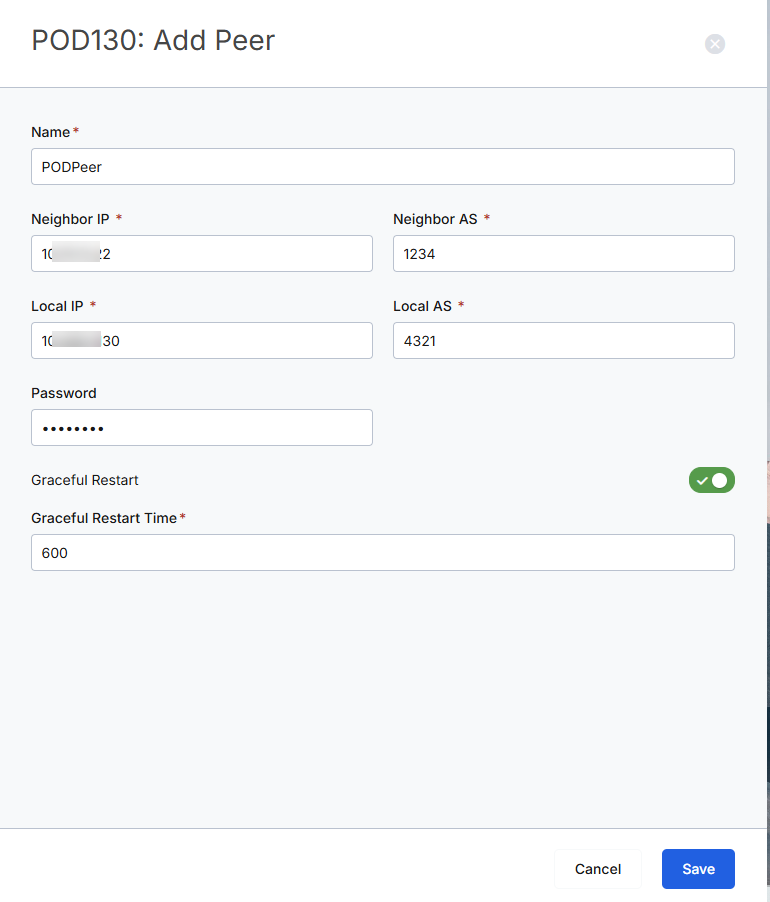
In the Add Peer panel:
- Name: Enter a name for this BGP configuration.
- Neighbor IP: Enter the IP address of the peer router for this configuration.
- Neighbor AS: Enter the autonomous system (AS) number that identifies this peer router's network.
- Local IP: Enter the IP address of the local network.
- Local AS: Enter the AS number that identifies the local network.
- Password: Enter the password shared between the two networks.
- Graceful Restart Time: Enter a time in milliseconds to allow the peer router to restart before timing out.
- Click Save to save the configuration.


