Experience Center
Configuring Machine Provisioning Keys
Within the Admin Portal, you can add a Machine Provisioning Key and a corresponding Machine Group. The Machine Provisioning Key is used to:
- Associate the Zscaler Client Connector with a Machine Group.
- Enable Machine Tunnels for Pre-Windows Login to gain access to internal applications even when the device's Zscaler Client Connector is not connected to Private Applications.
To add a new Machine Provisioning Key:
- Go to Administration > Identity > Private Access > Machine Provisioning Keys.
- Click Add Machine Provisioning Key.
- In the Add Machine Provisioning Key window:
- 1. Signing Certificate
The signing certificate is required for enrolling machines. You need to create a signing certificate before adding a new provisioning key.
On the Signing Certificate tab:
- Select a signing certificate from the drop-down menu.
- You can click Clear Selection to remove any selections.
- Click Next.
- 2. Machine Group
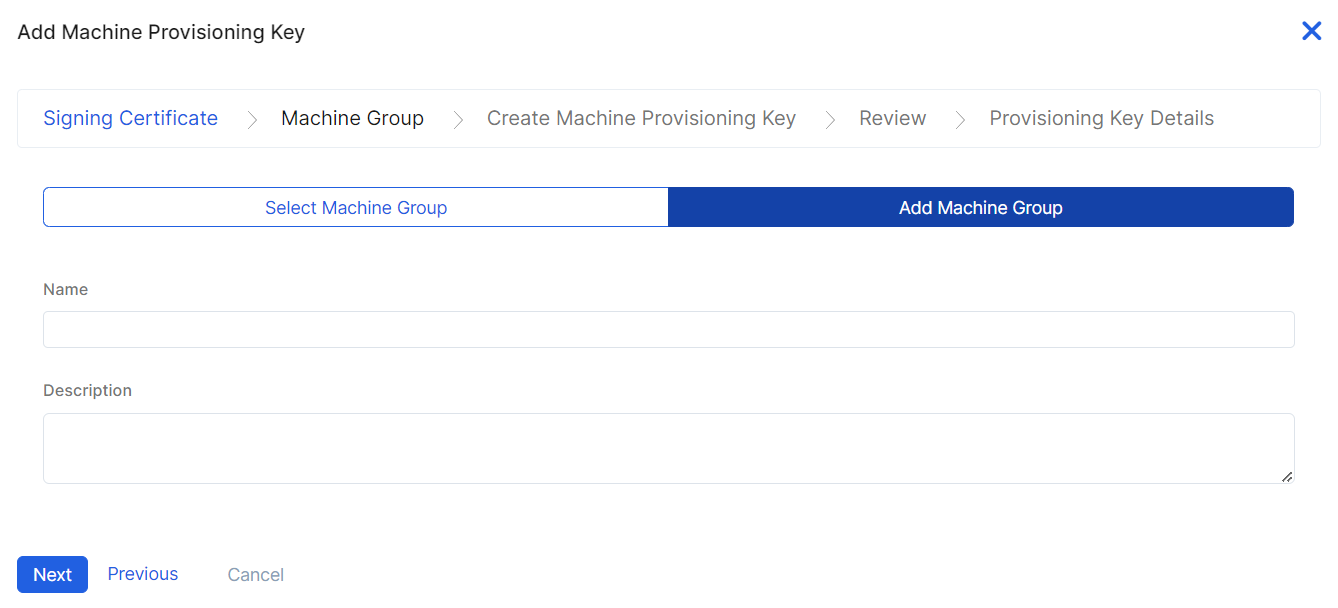
On the Machine Group tab, choose one of the following options:
- Choose an existing Machine Group
- Select an existing group from the drop-down menu. You can click Clear Selection to remove any selections.
- Click Next.
- Create a new Machine Group
- Click Create Machine Group.
- Name: Enter a name for the group. The name cannot contain special characters, with the exception of periods (.), hyphens (-), and underscores ( _ ).
- Description: (Optional) Enter a description for the group.
- Status: Make sure Enabled is selected.
- Click Next.
- Click Create Machine Group.
- Choose an existing Machine Group
- 3. Create Machine Provisioning Key
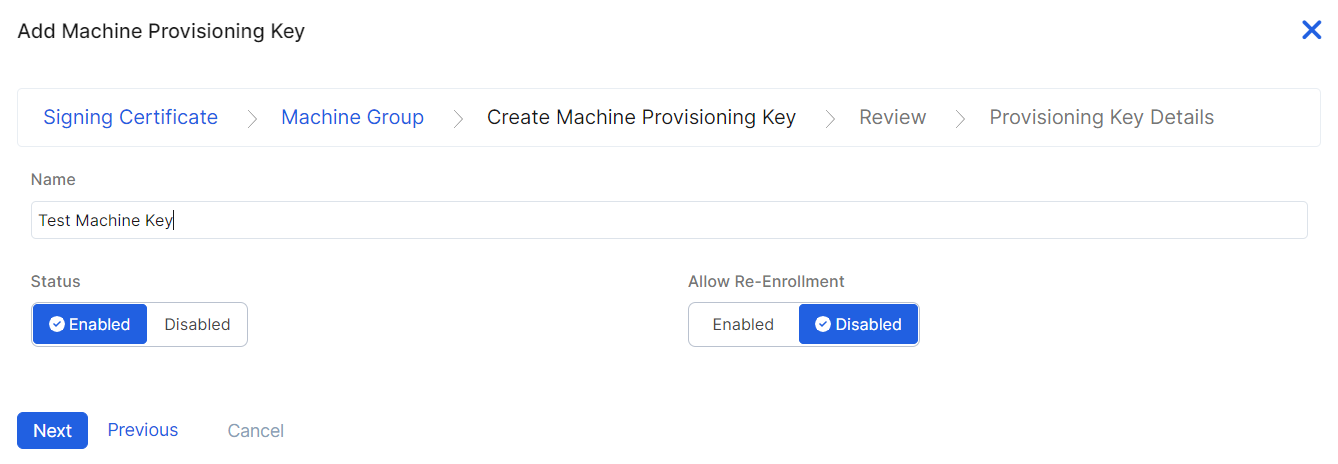
- On the Create Machine Provisioning Key tab:
- Name: Enter a name for the key. The name cannot contain special characters, with the exception of periods (.), hyphens (-), and underscores ( _ ).
- Status: Make sure Enabled is selected.
- Allow Re-Enrollment: Enable to allow for the re-enrollment of machines using the same machine provisioning key. This setting is disabled by default.
- Click Next.
- On the Create Machine Provisioning Key tab:
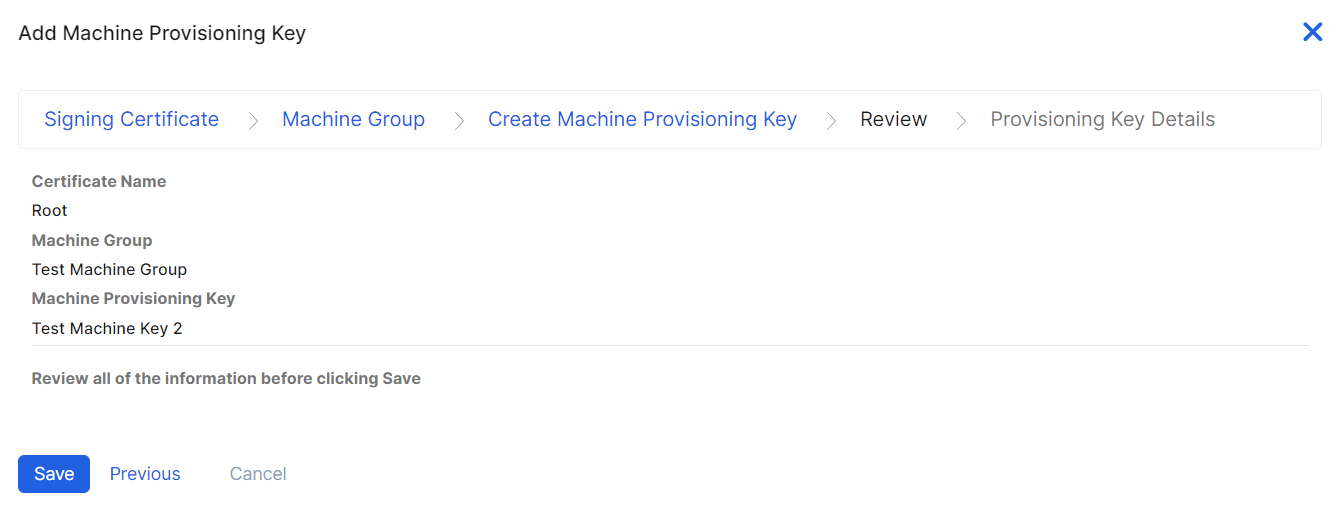
- 4. Review
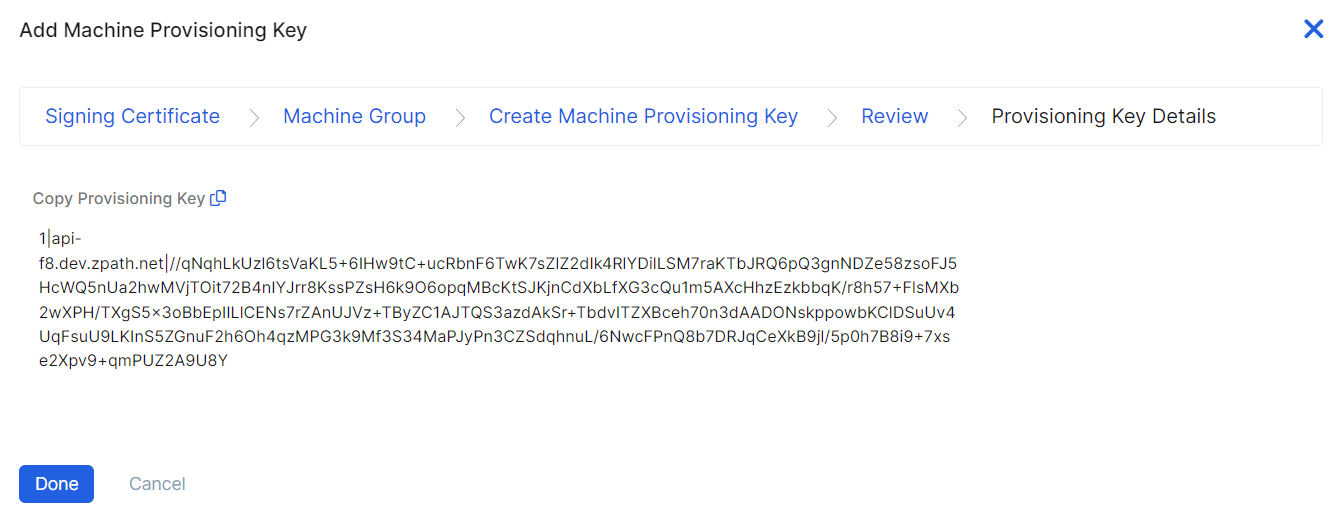
- 5. Provisioning Key Details
- On the Provisioning Key Details tab, copy the provisioning key. You can click the Copy icon to copy the key to your clipboard.
- Click Done.


